The Caldera: a sleek split and wireless keyboard
July 20, 2024
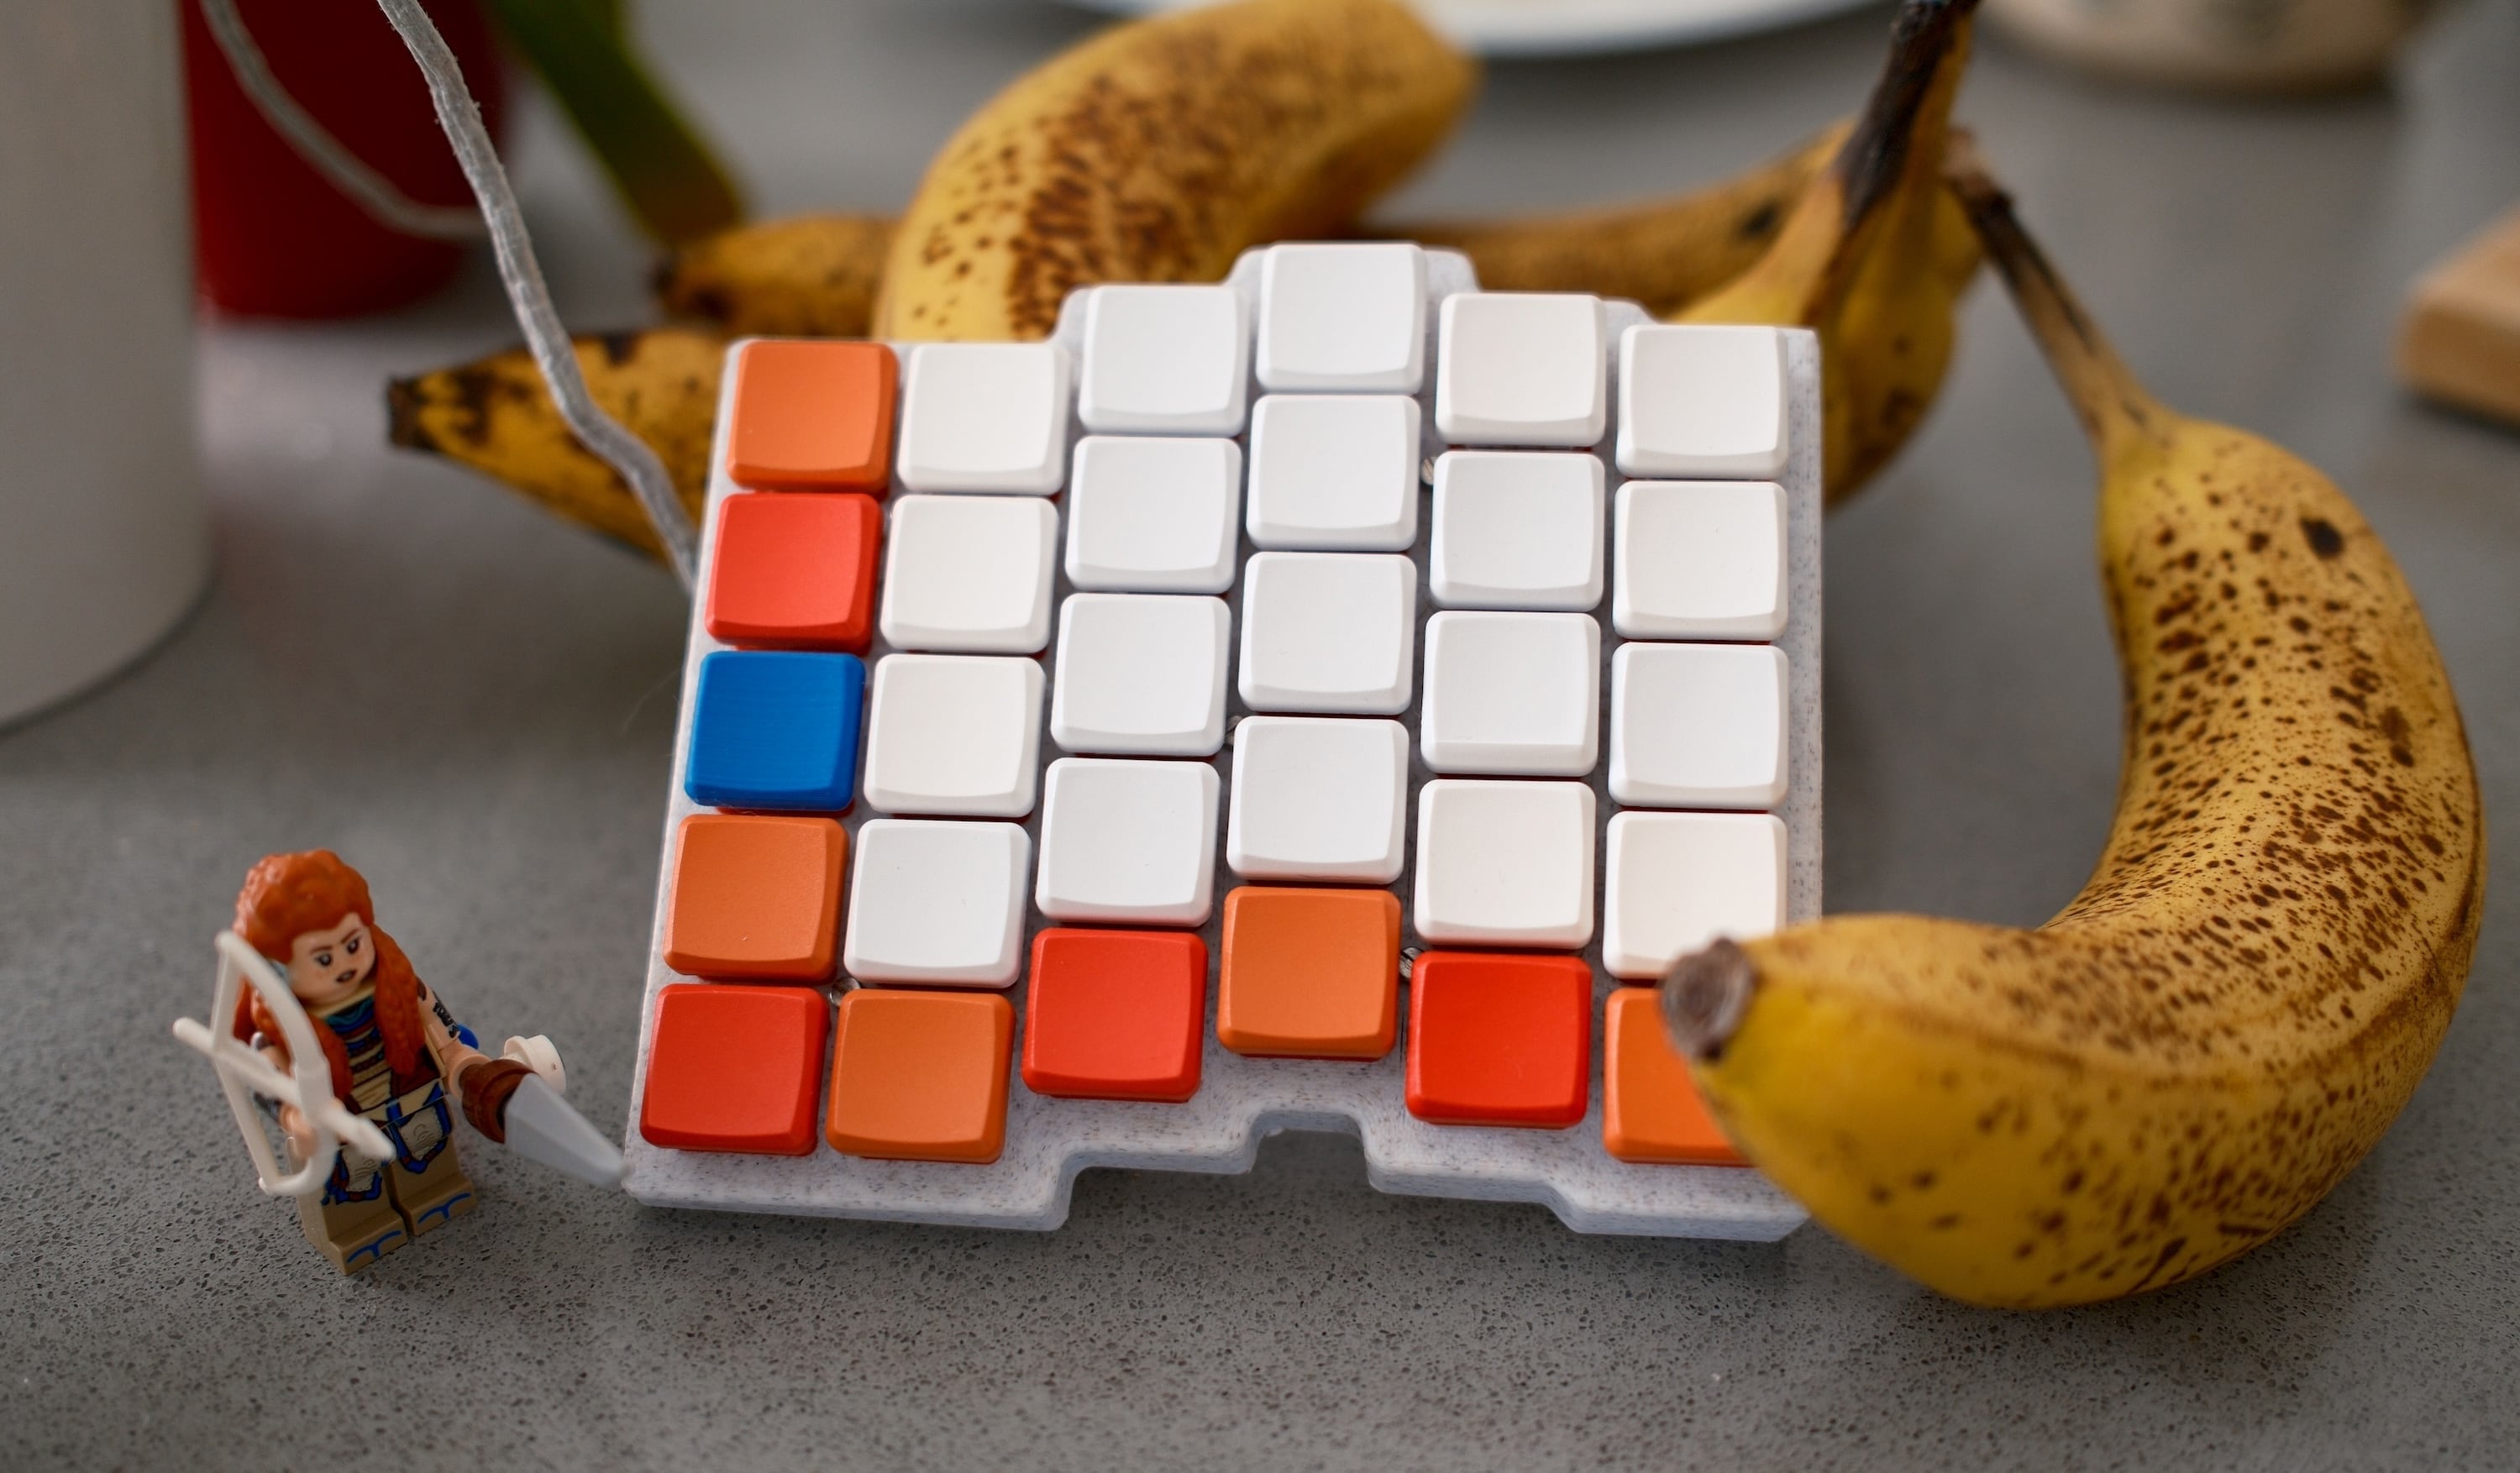
I designed my own keyboard and it’s freely available! I’m calling it the Caldera, and it’s basically my dream wireless split keyboard.
I’ve been using it for months, and I love it.
Video overview
If you’re a visual person, I made a fun little video showcasing the creation process as well as an overview of the keyboard. It serves as a nice tutorial too if you’re even vaguely interested in building your own custom keyboard. I’ve been wanting to make some more videos going forward, and this was a fun way to get into it! If you’d like some more videos on things I’m planning to create, subscribe to my YouTube channel!
Why and how?
I love split keyboards, they’re so nice on your wrists when you type all day and have helped my wrist pain immensely, but none of the existing keyboards were quite what I wanted. They were either wired, had key layouts I didn’t vibe with, or were too “techy” looking. I wanted a layout with all the right keys, a sleek design, and fully wireless with long battery life.
Of course there’s many resources for “building your own keyboard”, but they’re normally just an assembly kit for someone else’s keyboard, letting you change the switches or key caps. I wanted something fully custom, with the keys positioned exactly where I wanted them, and a clean design to boot. That means it needs a custom PCB.
I learned about a cool piece of free, open source software called Ergogen that helps you to build your own completely custom keyboard and I got to work learning it. The process was surprisingly easy, and the video above goes into how to use it from a beginner’s perspective. The video also touches on KiCad, which Ergogen hands off the PCB to, and Fusion 360 which I use to design the case. Then you just have to flash some simple firmware on it from ZMK where you just tell it about your keyboard.
Resources
Everything that I built for this keyboard is available open source on GitHub, from the Ergogen files, to the PCB files, to the 3D printable case files, to the ZMK firmware files. It’s all honestly pretty easy! The 3D printable files specifically can be found here.
If you want this keyboard for yourself, simply take the PCB files (the .zip gerber files on GitHub) and upload them to a PCB manufacturer (like JLCPCB or PCBWay, not sponsored by either), the PCBs will arrive, then it just requires a very beginner level amount of soldering (great first project honestly), some 3D printable cases, some standard keyboard supplies like keys and a controller, and then you just have to flash the firmware and you’ll have a functioning Caldera keyboard, or a basis for you to build your own completely custom keyboard! (It doesn’t have to be a split keyboard either!)
Supplies
Here are all the supplies needed for this project. It seems like a fair bit, but many are just great to have things that you can also use for other projects if you don’t have them already, and the rest are cheap just to grab for this project. None of these are affiliate links.
General tools
- Pinecil soldering iron
- Bambu Lab P1S printer (can likely also have a friend or local business 3D print the case for you!)
- Filament (I used Bambu’s white marble PLA)
- Kotto fume extractor (optional but highly suggested, please don’t breathe in solder fumes!)
- Solder (I use 0.6mm and recommend lead-free for health and environmental reasons)
- Tweezers (idk pick some up at a pharmacy if you don’t have any weirdo)
Keyboard specific things
I get most of these from Typeractive (except the PCB), makes one order easy, and has free shipping (not sponsored).
- PCBs (see above)
- Choc low profile key switches of your choice (I like Choc Pro Reds personally, Typeractive has them)
- nice!nano controller x2 (Typeractive)
- Controller hot swap sockets (Typeractive)
- PS3 controller replacement battery (Amazon)
- Battery input jack (Typeractive)
- Diodes (Typeractive)
- Reset button (Typeractive)
- Kailh Choc hot swap sockets (Typeractive)
- Key caps (I like Choc MBK key caps, which Typeractive has)
- Battery power switch (Typeractive)
- 10x M2x3 screws, and 5x M2x4 standoffs for assembling each side of the case (so 20 screws and 10 standoffs in total) (I’d just grab a small kit on Amazon)
- (Optional) 6mm (0.24") diameter x 2mm (0.08") height rubber feet for the bottom of the case
Totalling up the cost of the project, I’d estimate you could put this keyboard together for under $200 (talking about consumables, not including tools that you may or may not already have).
Enjoy!
If you build the keyboard or have feedback on my video about building it, I’d love to know! Hit me up on Twitter/X, Mastodon, or Threads! It was a really fun process to learn and was a lot easier than I ever imagined it to be, so I’d definitely encourage you to go out and try if there’s a keyboard you wish existed!