One day there will hopefully be a house on this land
Over the last year, I admittedly haven’t used my Vision Pro a ton, but fairly recently I discovered a super handy use that it’s absolutely incredible at, provided you have the right tools.
After years of apartment life my girlfriend and I have recently begun the process of building our (first! exciting!) home, which is an absolute whirlwind of choices and decisions. Maybe it’s where we’re both programmers, but particularly for me, my software-oriented brain feels almost incompatible with this world of designing a home (she’s the main one keeping this project moving forward).
In software if you don’t end up liking a feature after playing around with it for awhile, you can tweak it or remove it entirely (try doing that with a poorly placed wall). Here, decisions feel huge and hard to commit to.
On top of this, the housing market is really expensive right now in many parts of the world (ours definitely included) so making good use of every square foot feels paramount.
(Don’t worry, we have a great architect who guides us skillfully, but ultimately it’s up to us to sign off on everything!)
Enter the Vision Pro
Looking at PDFs of potential floor plans, you don’t (or at least I don’t) develop much of a sense of scale or connections with a bunch of black rectangles. This room says it’s 13 feet by 15 feet, I guess I can get out a measuring tape, but what does that feel like? Would this hallway be cramped? What all can you see when you first walk into the house?
Then it hit me: virtual reality! There’s other VR devices that have better gaming chops, but I’m not sure there’s a consumer device out there that’s better than the Vision Pro on paper when it comes to rendering a virtual world with its high resolution screens and then placing you in it with its abundance of sensors.
Problem is, how do you go from floor plan to virtual reality?
Let’s get creatin’
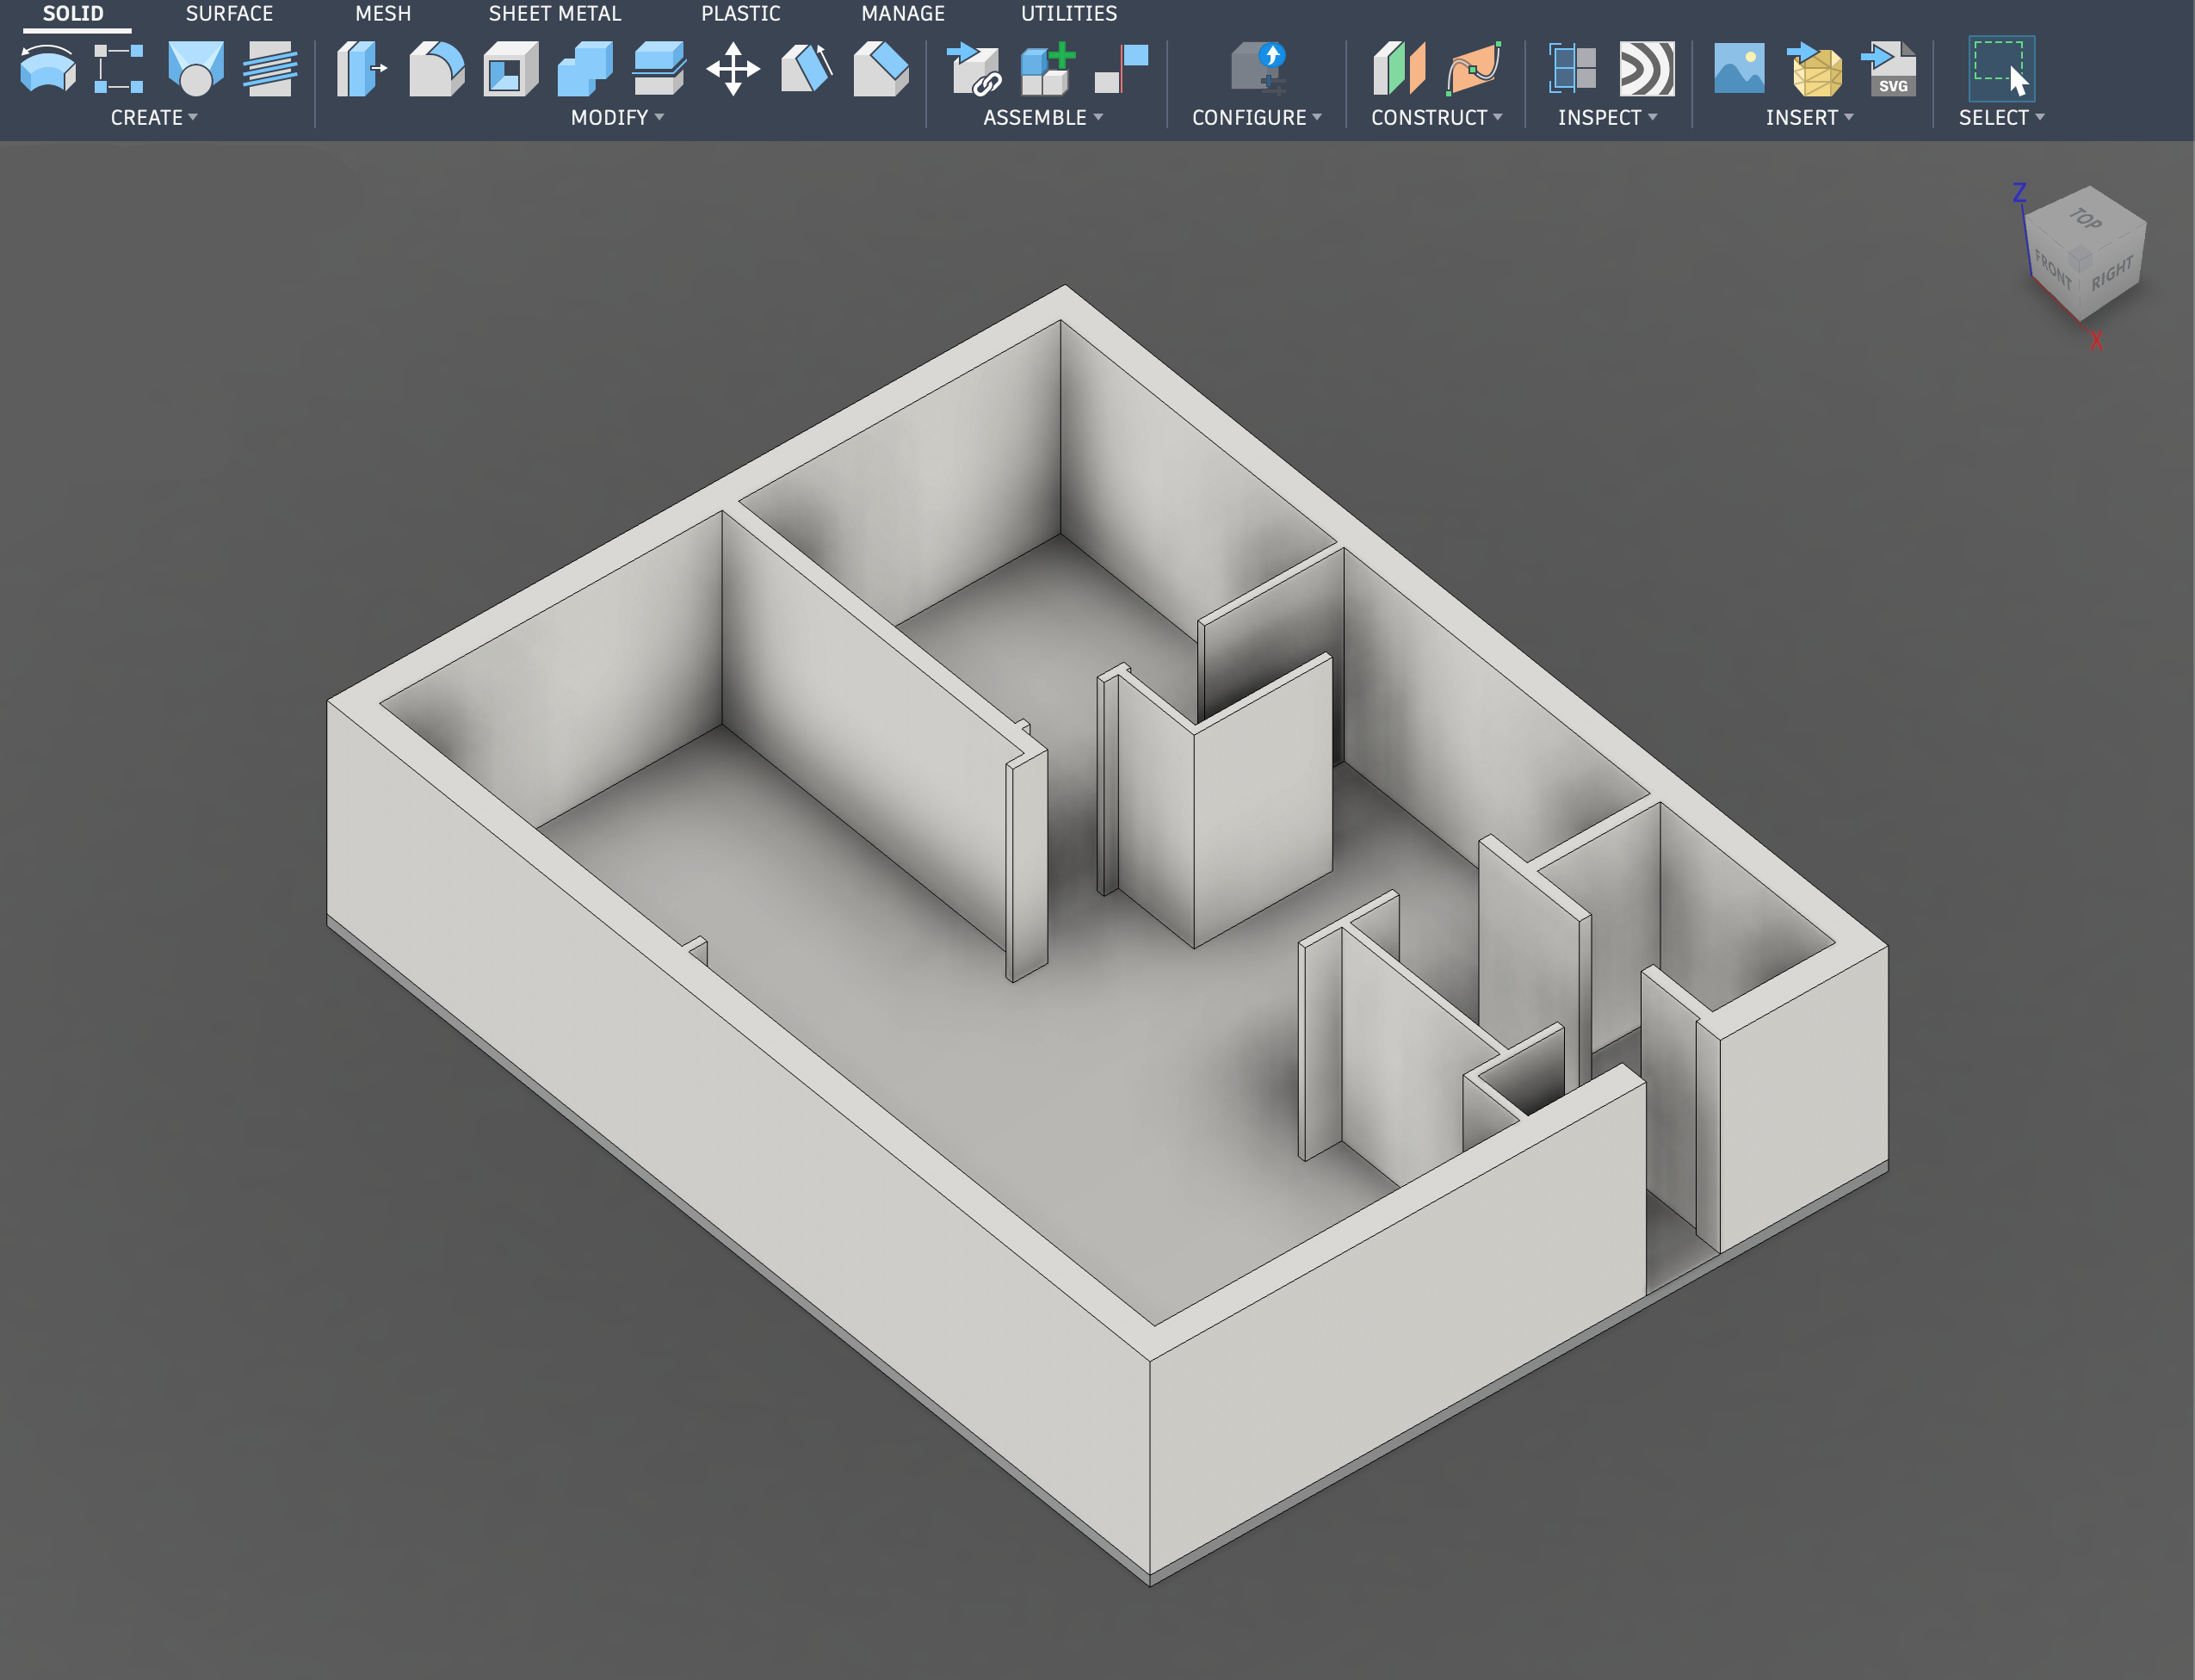
I have a bit of experience using Fusion 360 (free 3D modeling software for hobbyists), so I had the idea to try to quickly build the floor plan up in 3D. Nothing fancy, just floors, ceilings, and walls, with holes for doors.
If you’re not familiar with 3D design tools, this is a great first project, you’re basically just drawing the floor plan out in 2D and then extruding out the walls. YouTube and asking AI questions are awesome resources for learning this handy skill in 2026. Sites like Fiverr are also a great resource, I’m sure there’s an abundance of people there who could take a floor plan you’re interested in and turn it into a 3D file for a reasonable price.
Leveling it up
A bunch of walls, ceilings, and holes in the wall is pretty powerful, but without actual objects or texture in the space it’s still a bit hard to get scale when you’re “walking around”.
You know how you walk into an empty apartment for the first time and you’re like “Holy crap there’s so much room” and then you add your belongings and there suddenly isn’t? It’s kinda like that, we need to add some models and materials to the space to actually ground our perspective a bit and give things scale, otherwise it feels like walking around a warehouse.
Adding textures
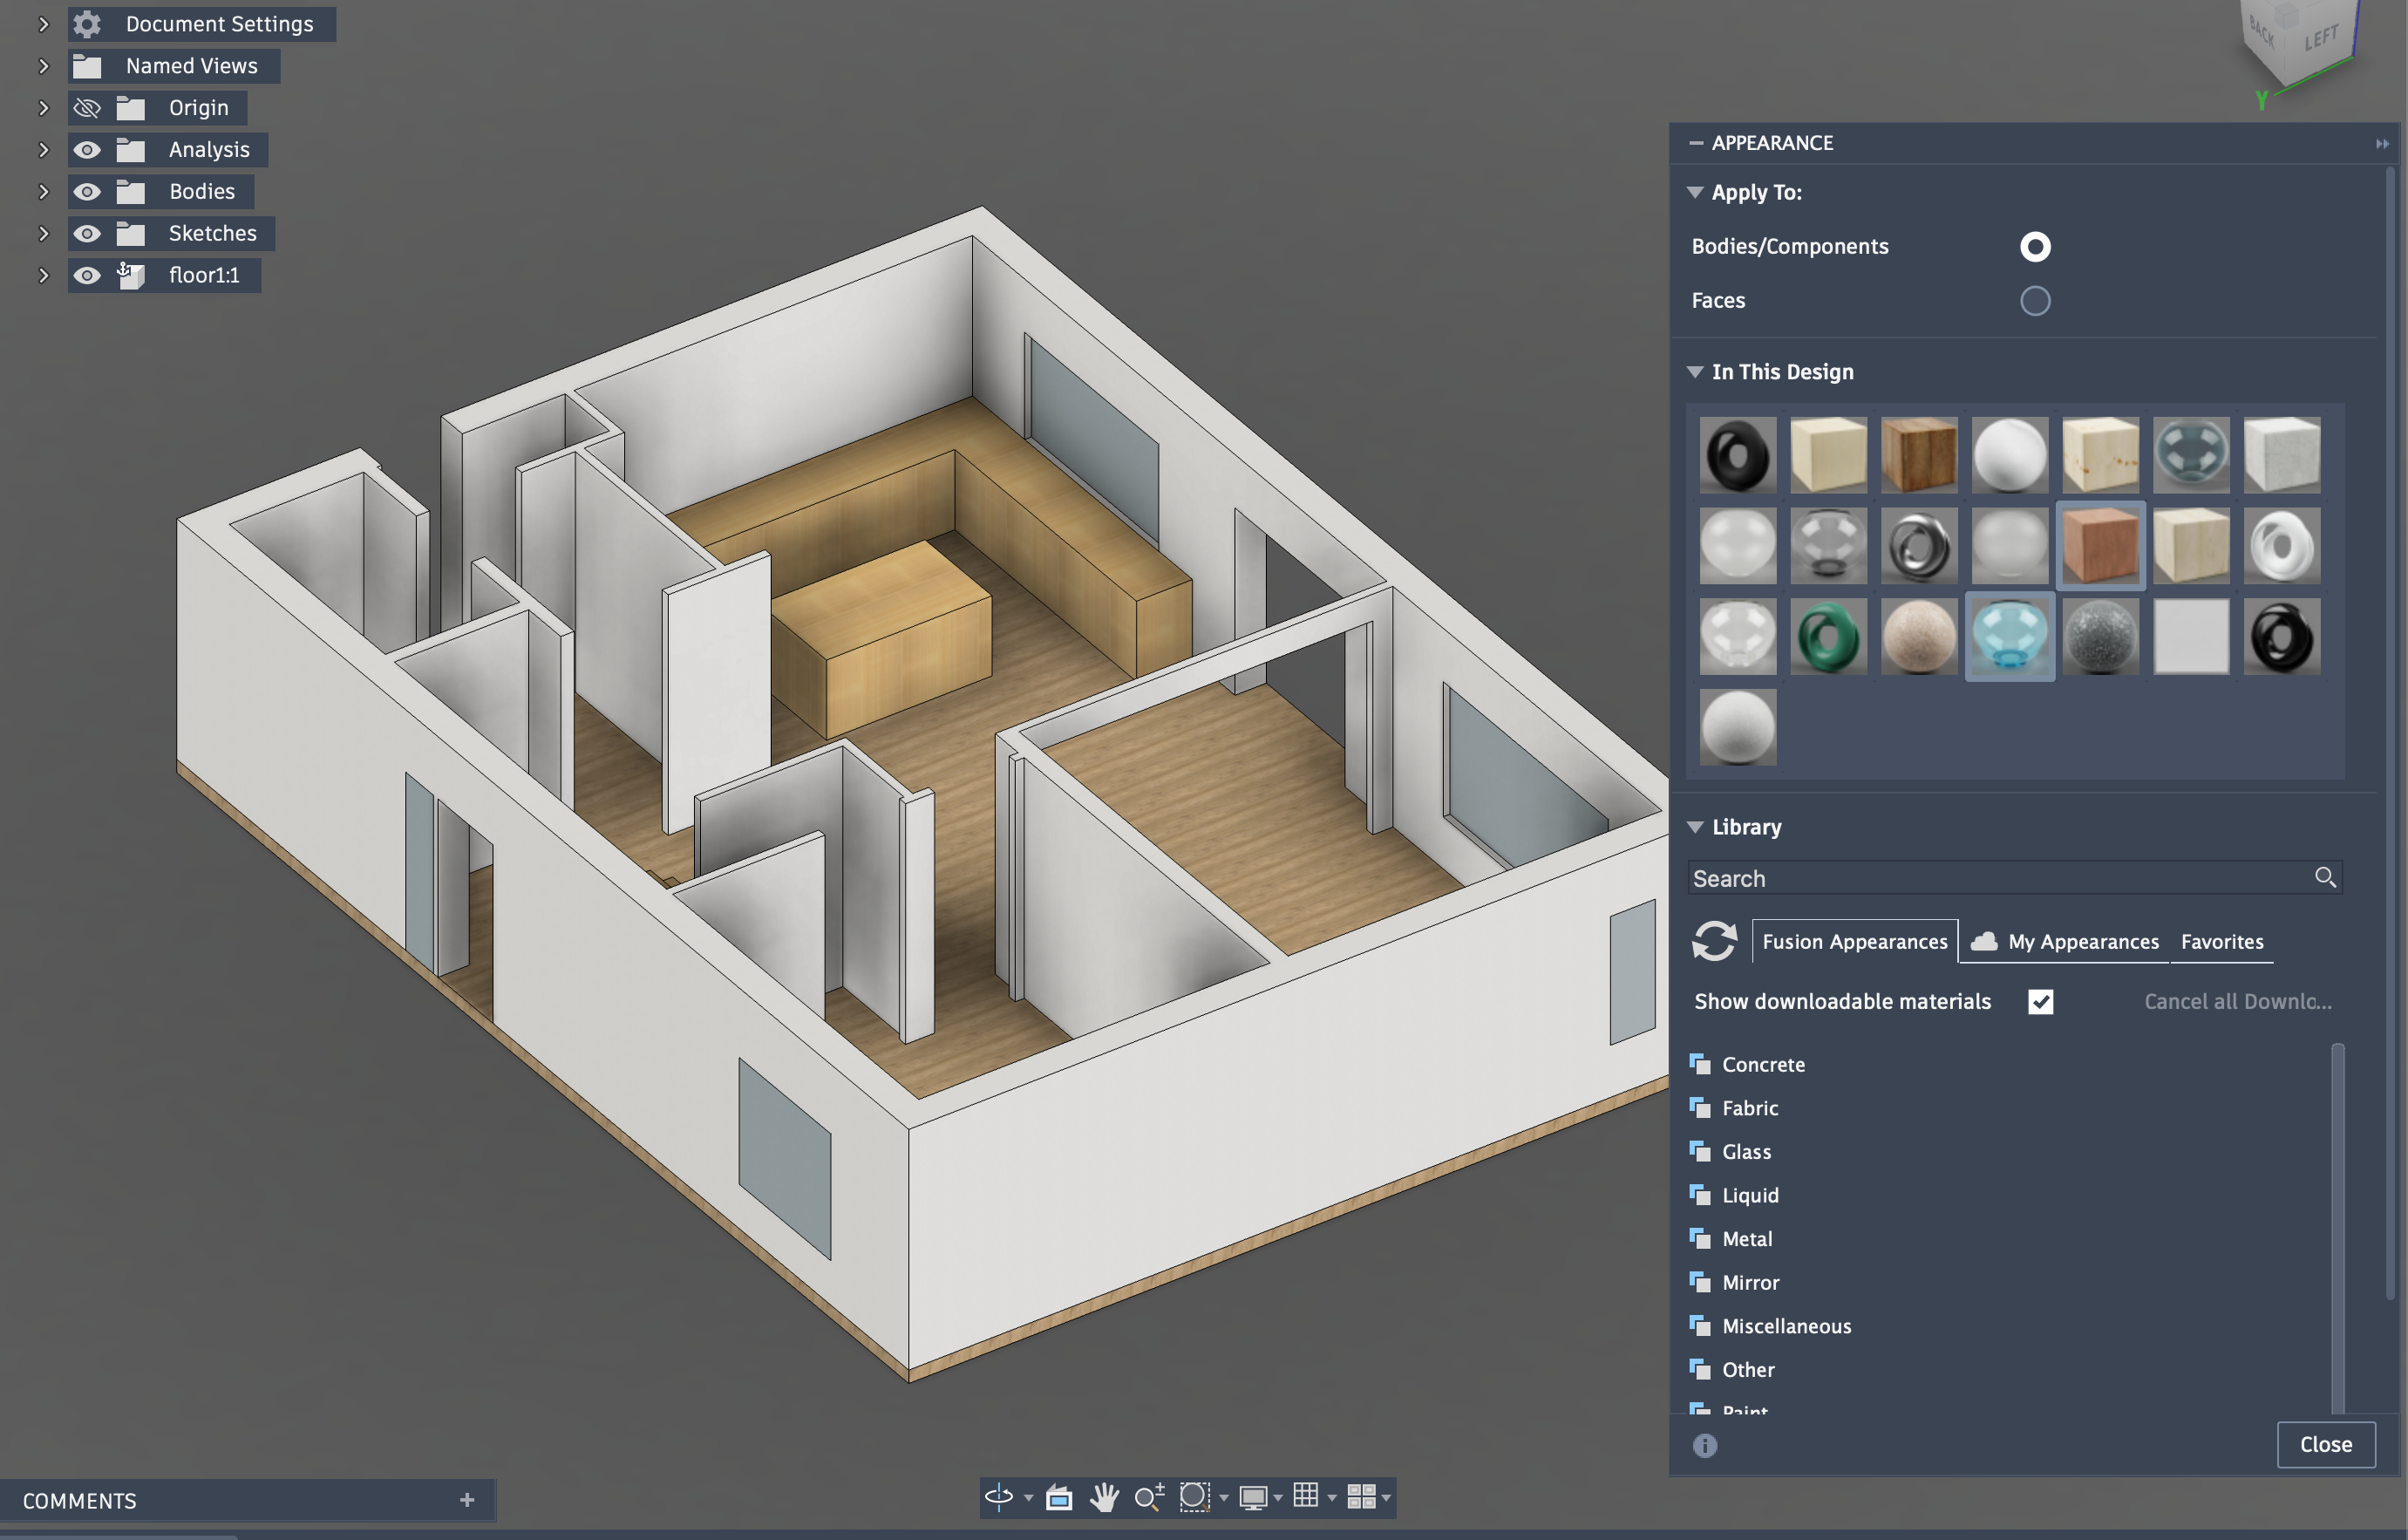
Quick easy one. In Fusion, tap the “A” key to bring up the Appearance panel and you can drag and drop a bunch of common textures like wood, stone, or paint onto objects. This can really help to break up the monotony of everything being the same dull texture and actually gives the place depth.
There’s even glass textures for windows which is pretty handy.
IKEA
I can model a counter or a kitchen island (just a bunch of rectangles) but anything beyond that and I’m tapping out. Thankfully IKEA has a massive amount of furniture with corresponding 3D models, and even if you’re not a big IKEA person (wow aren’t you fancy) having any approximation for your final furniture in your place really helps you get an idea of how things fit together and can be positioned.
The couch I'm typing this on. It's comfier in real life I promise.
Problem is, no easy way to get access to those 3D models from what I can tell. Thankfully, with a script for the Tampermonkey browser extension you can easily download them. Not every item on IKEA has a 3D model unfortunately, but seemingly the majority do.
This is super handy for adding a couch, a bed, a desk, an area rug, etc. to the space so when you walk into a bedroom your eyes kinda see the bed and desk and get a good idea for the scale of the room, which lets you understand if it’s a good size or if the dimensions are proper, and you can kinda imagine what it would be like to exist in that space.
Downside is this downloads a glb file, something I wasn’t familiar with. Fusion allows us to easily import obj files, so we need to convert it to that. After trying a bunch of scripts and websites, I honestly found this website to be the best. Little janky, but it works.
Also note that the resulting obj file (and the folder it’s contained in) often won’t render textures inside Fusion 360, but when you export them from Fusion they show up as expected.
3D Warehouse
That covers a lot of furniture, but not everything. Maybe you want to see how a stand mixer looks on the counter or if you can fit a rice cooker comfortably. Heck, you can find your car and put it in the garage for reference.
This is where 3D Warehouse comes in, it’s a community-driven website where people can upload free 3D models they create and easily import them into Sketchup, another popular piece of 3D modeling software (that might even work better than Fusion for house design, I dunno, haven’t used it much).
Problem is, the files aren’t easily usable in Fusion, but I found a nice workaround.
If you open the URL on your iOS device instead, it gives you the option to view it in 3D inside your current environment. Within that view, if you tap the share button you get access to the actual USDZ file that powers this experience, at which point you can just AirDrop it to your Mac. Nice!
From there, even though we love a USDZ file, Fusion seemingly doesn’t for importing objects, so back to that previous website to convert to OBJ. From there it’s as simple as bringing it into Fusion and placing it.
Look, a stand mixer and a sink!
This website is seriously awesome, there’s a model for just about anything you’d put in your house.
Programming!
Now that I have something I’m happy with, I remembered Apple platforms love the USDZ file format for 3D models, and sure enough Fusion had a USDZ export option. Nice!
With a file in hand, we’re getting somewhere, so I AirDropped to it to my Vision Pro and opened it. This worked pretty okay for viewing it, and you could even walk around a little bit, but unless you live in a warehouse walking the full length of a virtual house without bumping into something and ending up in those VR fail compilations is pretty tricky. I want something better.
This is where vibe coding is perfect: putting something technically impressive together when you would have never bothered to take weeks to put it together traditionally. Is the code perfect? Nah, but the alternative is it never existing, and it’s just “for fun” anyway.
After some intense typing with a combination of Claude and Codex over the course of a morning I had something I was pretty happy with. I named it Prospector (can’t remember why) and I’ve been really happy with it.
It looks jittery as all VR videos do, but it's super smooth in real life
Here are a bunch of the features that level it up beyond just viewing a USDZ file in the Files app:
Controller support! Walk around like you’re in a 3D video game, with motion controls as well as the ability to rotate the camera (you can still walk and look around normally of course, this just augments that).
Skybox! Pretty rudimentary, but added a forest style skybox as the exterior of the world so if you look out a window you don’t just see your current environment
Terrain following! If you tap the right D-pad button the controller will map you to the terrain, so you’ll go up and down with any undulations in the terrain. This is really handy if you have a survey of your property done so can effectively have a full view of your property’s terrain and “walk” through it
Toggle real life! If you hold your thumb and middle finger together for a moment it will toggle the virtual world on and off, this makes it feel safer if you want to take a step forward in virtual reality but are unsure if you’re going to bump into a table in real life.
Take flight! With the triggers you can fly up or down, great for going between floors for instance, and then if you press up on the D-pad it’ll reset you to the ground level.
Speed mode! Pressing left on the D-pad makes you move 6× faster, which is really, well, fast when you’re crossing a big property rather than poking around a single room.
With all those together, this is a really helpful way to view USDZ files on the Vision Pro. You can really easily explore a space and position yourself in new areas to look around, and even take off the headset to show a spouse or friend so you can gather their input on any changes. Then making a change is as simple as tweaking the file in Fusion, re-exporting, then re-running.
Download link
If you want to play around with Prospector, my super janky, vibe coded USDZ viewer, I put the contents up on GitHub (it would take a fair bit more work to polish this up into something I’d be comfortable submitting to the App Store).
Using it is as advertised: janky. Take your USDZ file, import it into Xcode, and inside ImmersiveView.swift change the USDZ file name to whatever the name of your file is. You can also tweak the skybox (Poly Haven has a bunch of awesome options). Then, just pair a controller to your Vision Pro and run the project on your device.
Just know I coded like 0% of this, so if it’s terrible you can’t judge me. Don’t you dare. I’m sensitive. Judge the AI.
This is awesome
No seriously, this feels so powerful. When we finally decided on a plan, through the fancy Revit software our architect uses he was able to bring us on a 3D walkthrough of our future house. It was cool, kinda like a Google Streetview-esque experience where you could click to teleport around the house and drag to look around.
But honestly, after already seeing it in full, immersive 3D where you can look around and feel like you’re there, we already felt like we knew the place. It really feels like one day in the future visiting potential designs in 3D will be a core part of the process, and if you have the hardware that future is possible today.
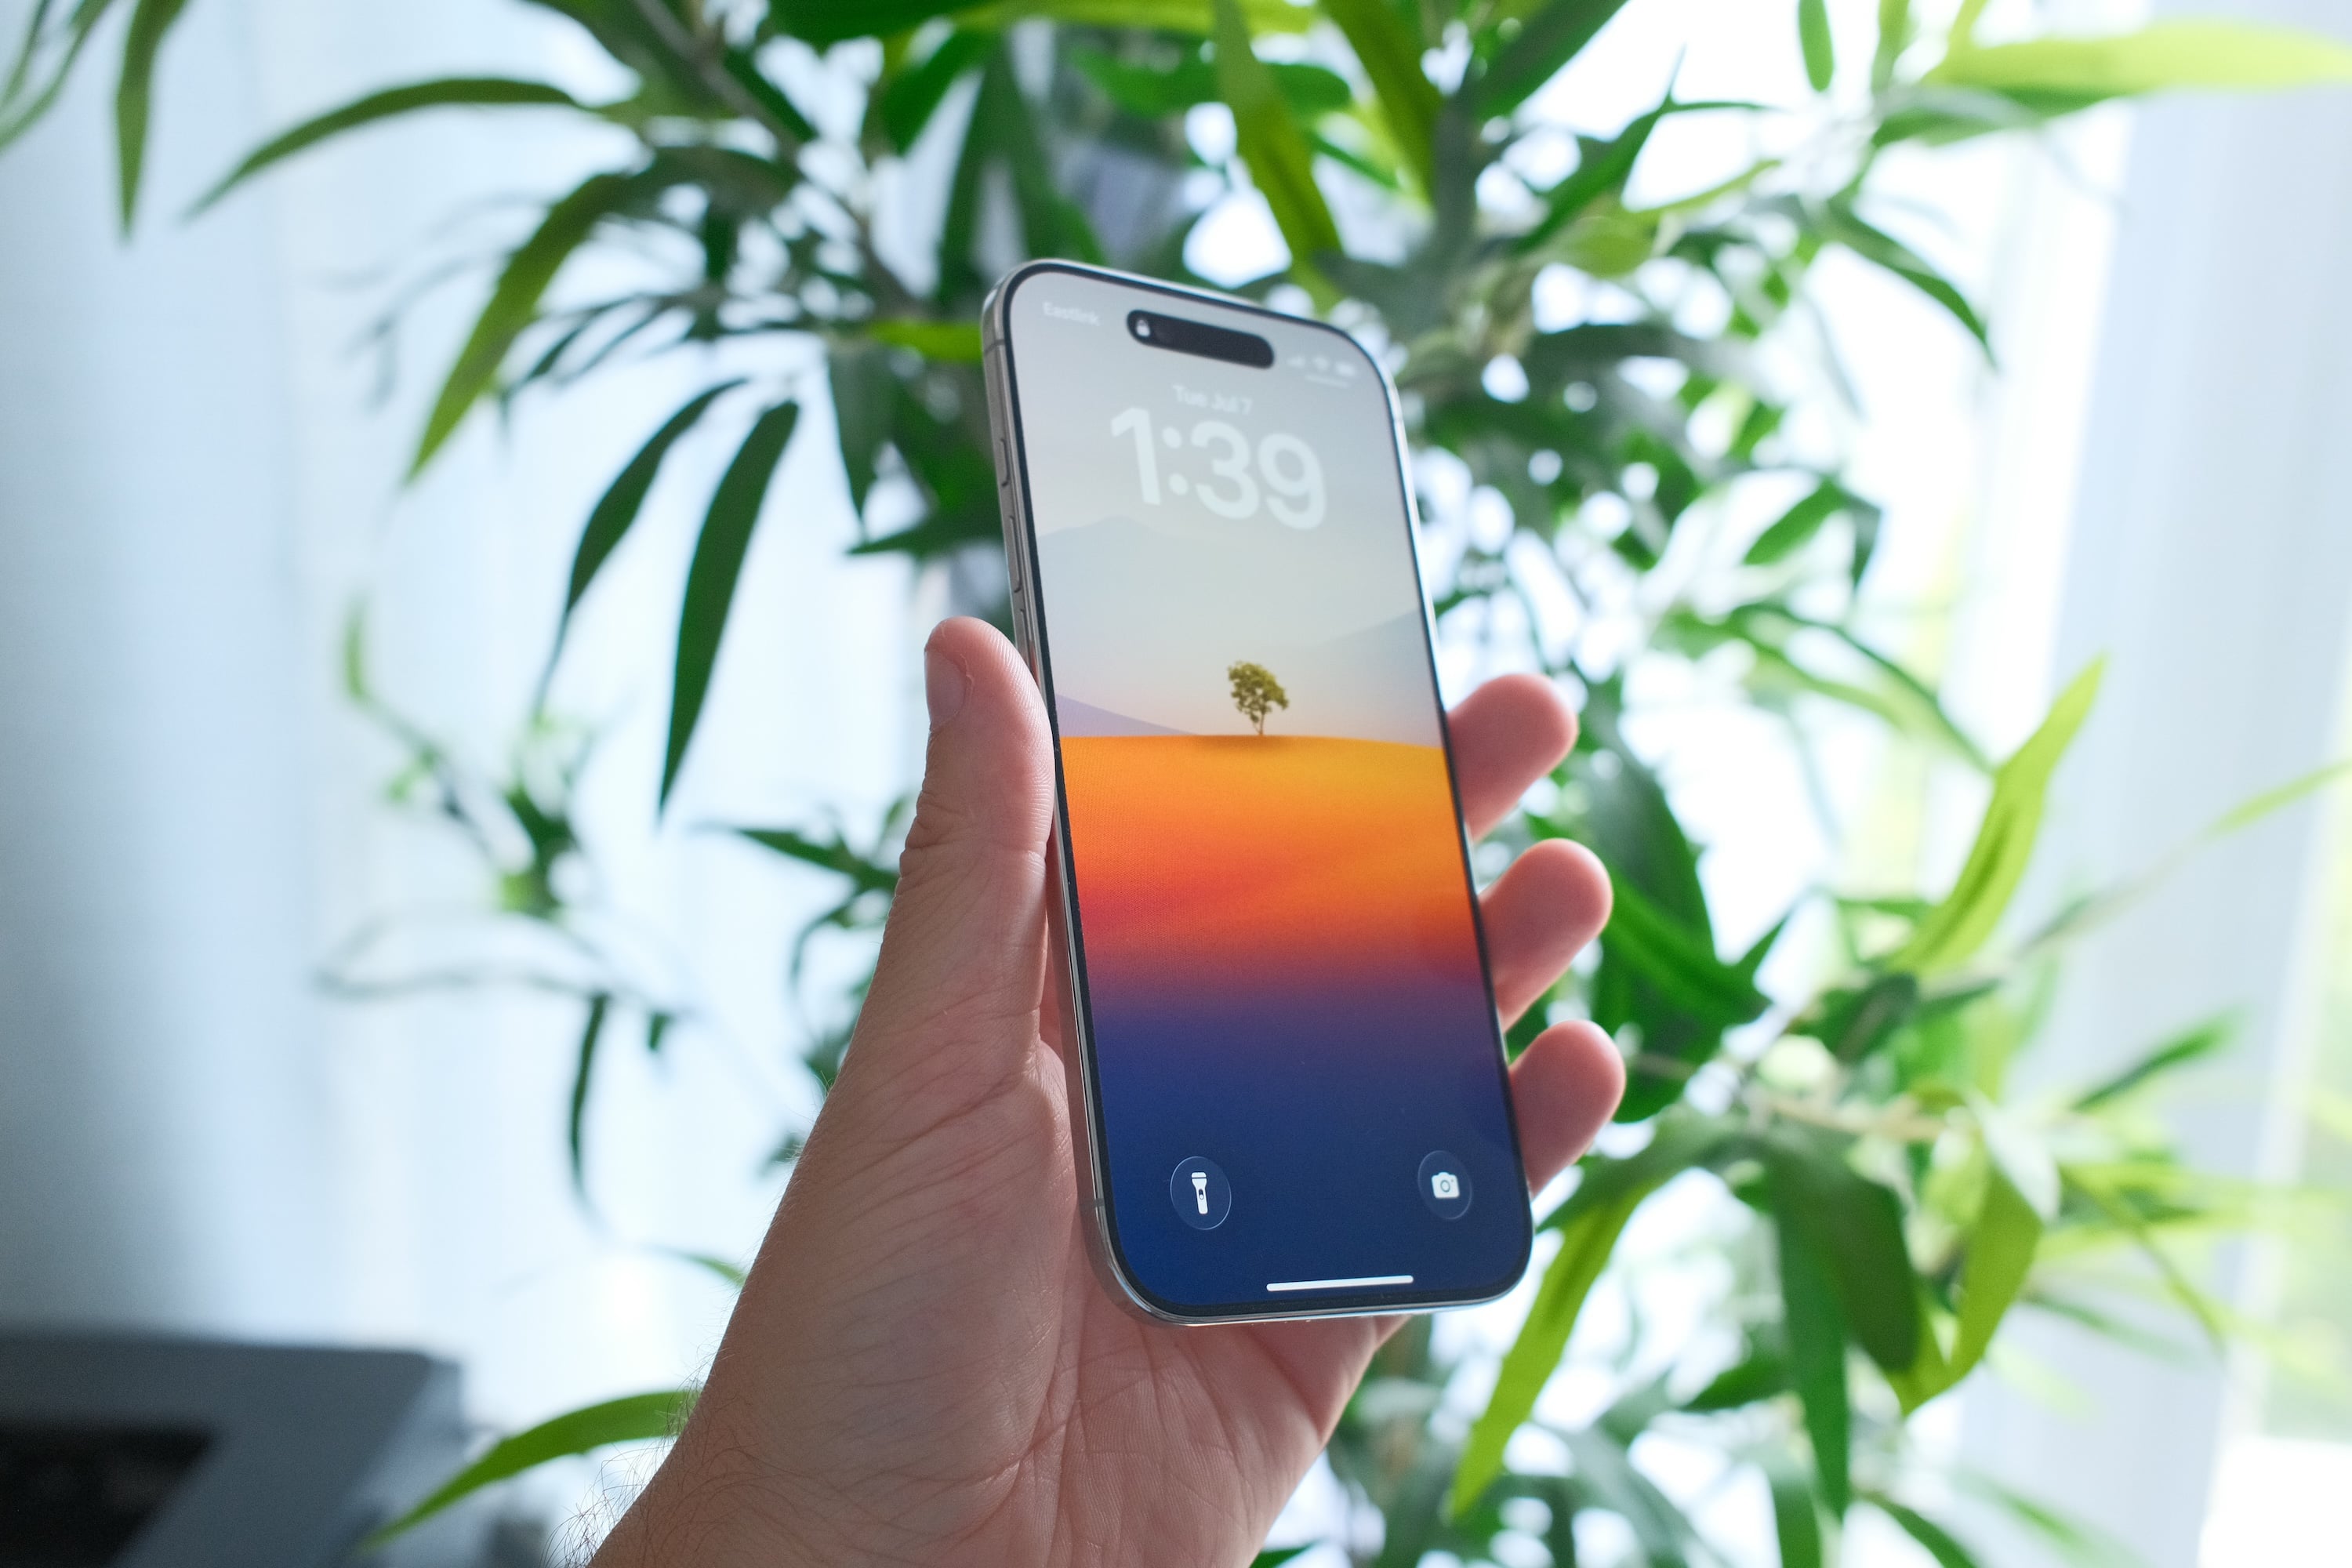
Hard to believe, but it’s been over 9 months since the current crop of iPhones came out, and I elected to grab the (apparently not super popular) iPhone Air, a new model of iPhone introduced for the first time. Rumor season for the new iPhones is in full swing, so it seemed like a good time to jot down my thoughts on the current model.
Immediately, it’s really something to behold when you pick it up for the first time, it feels weirdly thin, pretty much everyone I’ve showed it to has been like “whoa”. You sacrifice a fair bit to get to that, from cameras to battery life, but I’ve always been a sucker for something novel, so when something as huge as the iPhone had a quirky new model I was really stoked to check it out.
Heck, part of my frame of mind was that this device is going to have some serious limitations, which will probably also apply to the rumored upcoming folding iPhone which I also really want to check out, so it’ll almost be a warmup round to get me in the right headspace for a folding iPhone. I think that makes sense?
Either way, over the last 9 months it’s been my primary phone day in and day out, and I wanted to jot down my thoughts on what it’s like to live with as someone who normally goes with the Pro phones, because there’s been some surprises.
The design
Picking up an iPhone Air for the first time is almost weird. Phones have had such a consistent slab design for so long that making it so, so dramatically thinner almost confuses your brain a little bit, like it’s an illusion or something. Forget putting a case on it, live with the danger.
My favorite example was handing my phone to an employee at a local store to show her a product I was looking for, I could see kind of a confused look when I handed it to her followed by a “your phone is so thin”, almost like she thought there was something wrong with it.
But, here’s my hot take. After the better part of a year it no longer feels thin, it just feels normal. Sure, when I pick up an older iPhone I’m lke “whoa this is so thick it feels like a relic”, but the Air doesn’t really feel noteworthy to me anymore. It’s like if you live in a cinnamon factory, I assume day one you’d be like “this is the best smelling place ever” but after a few months you’d go nose blind to it.
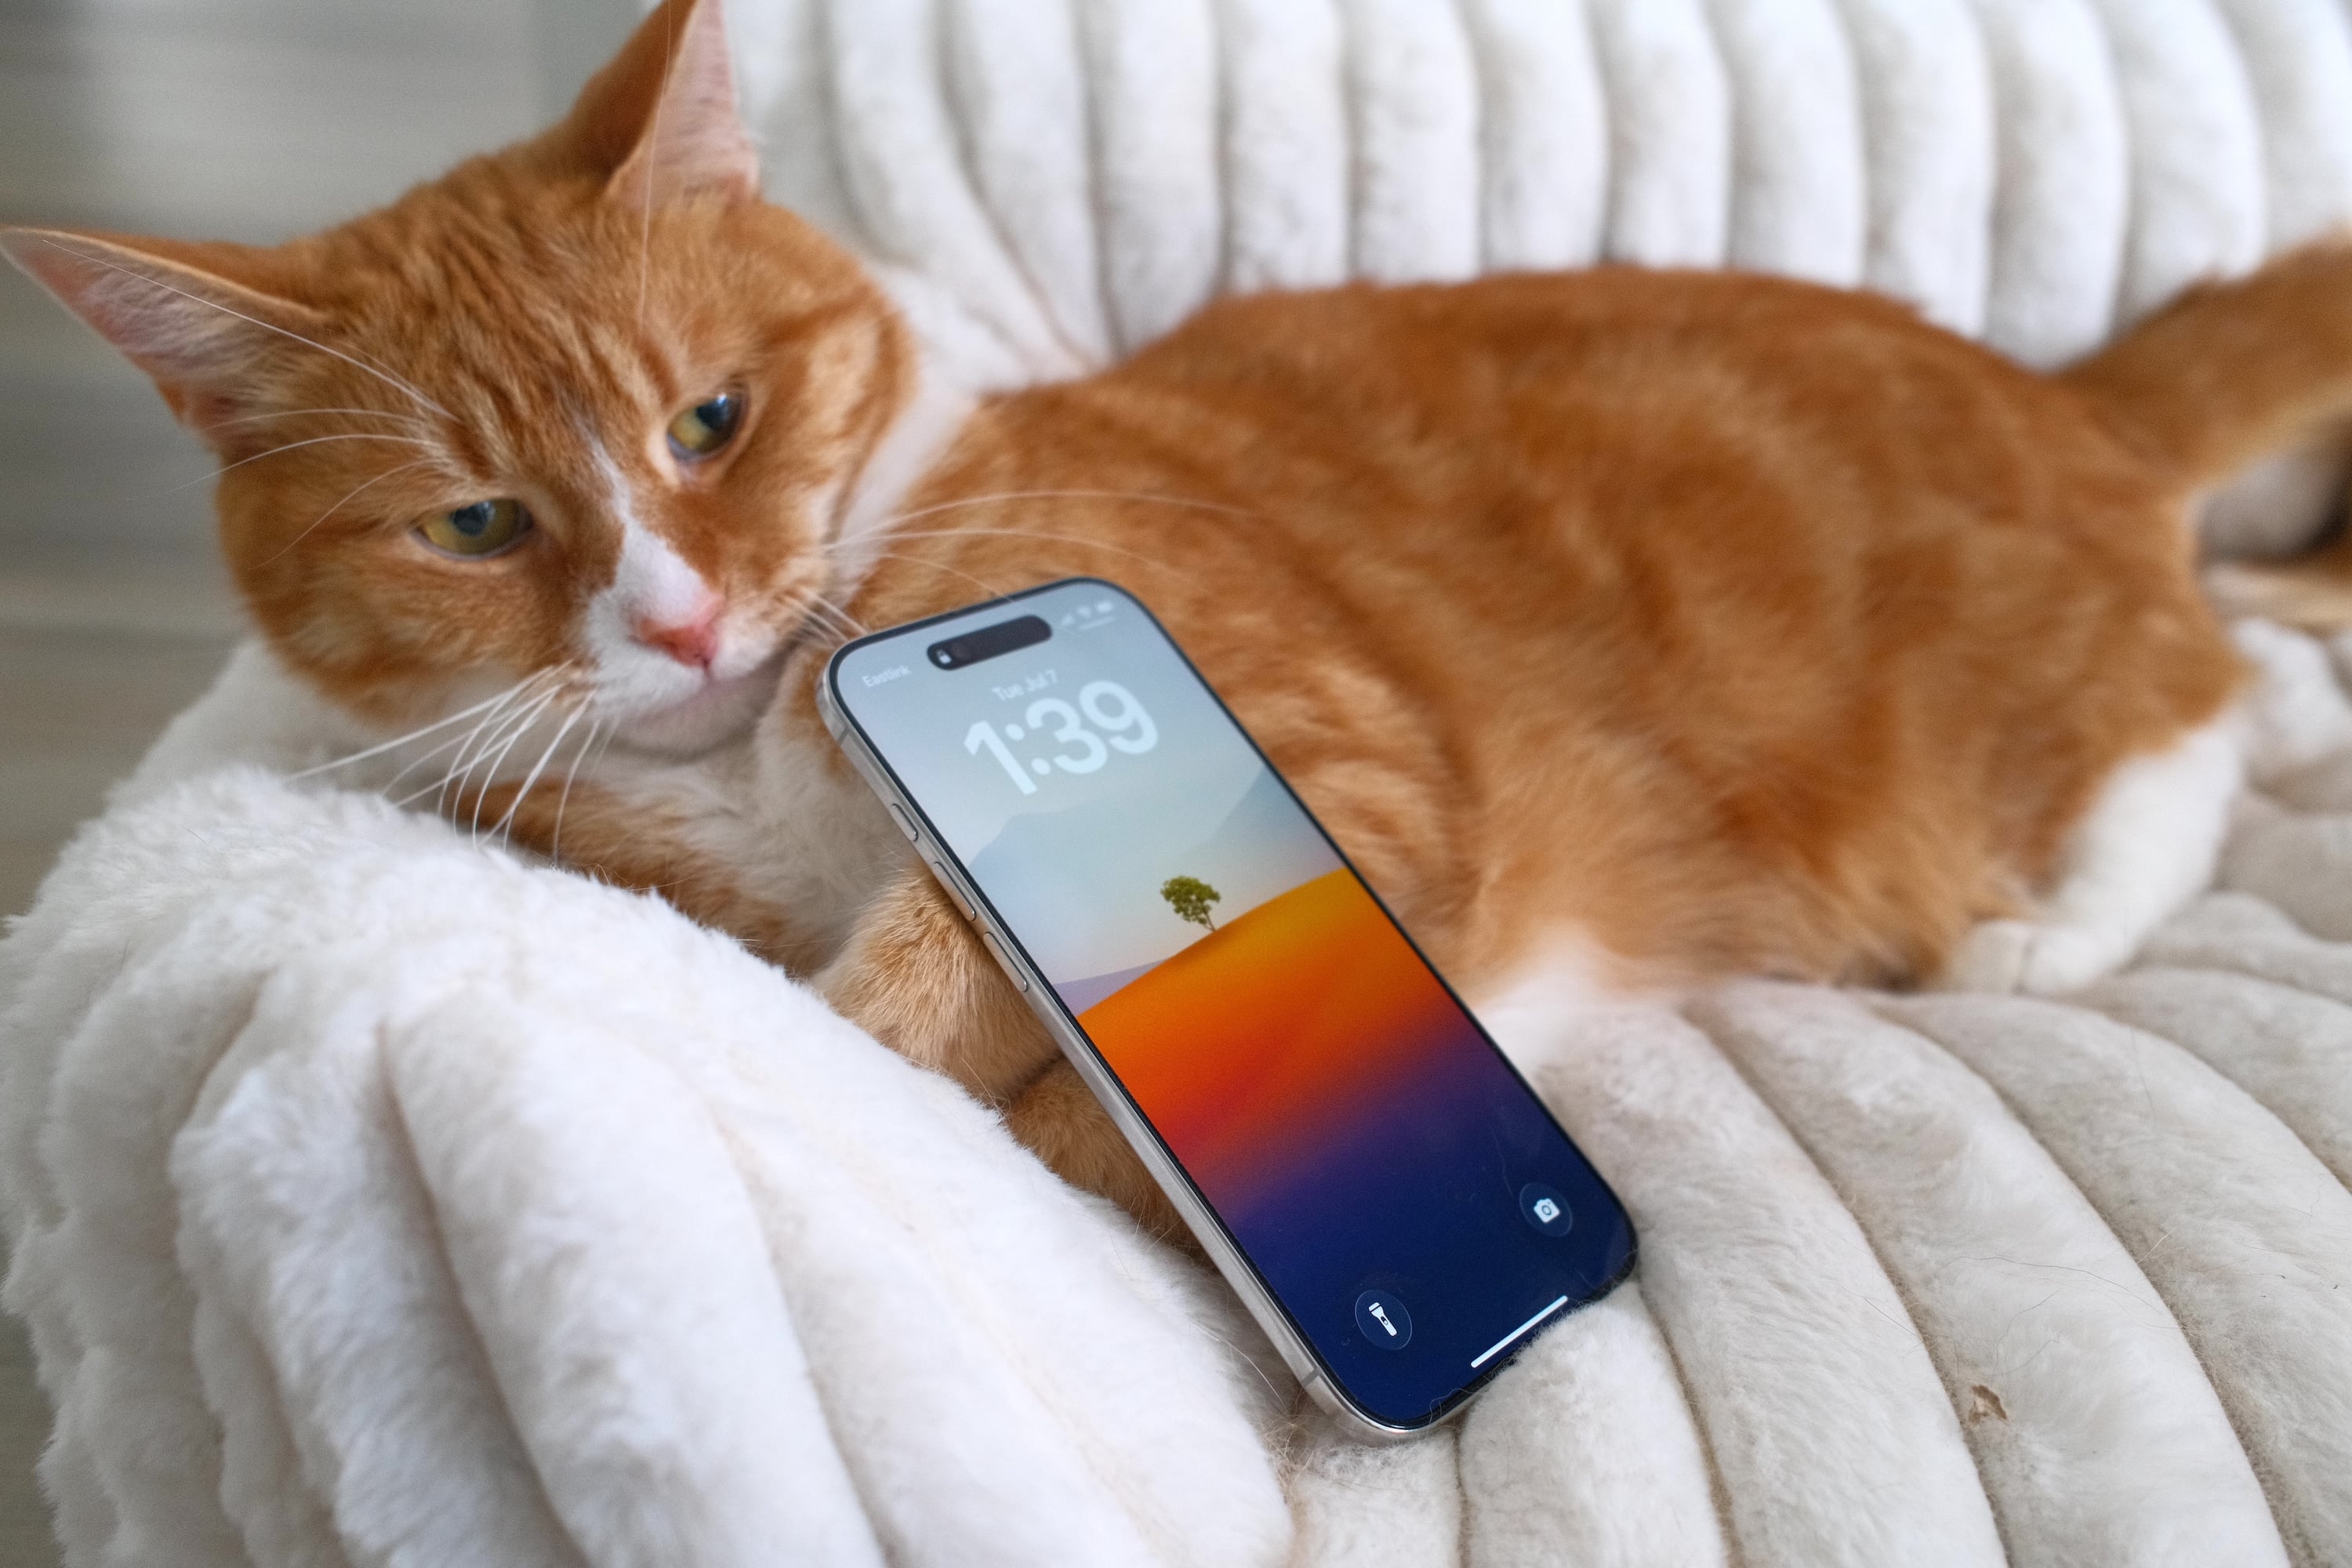
My cat wouldn't even give the Air a chance, clearly a Pro phone fanboy
That gives me pause, because it kinda makes me wonder that if any reasonably thin phone just feels normal after awhile, is it worth a bunch of compromises just to get it even thinner, when even that thinness feels normal eventually? I kinda feel like I thought about the thinness of my Pro iPhone the same amount after 9 months as I do now with the Air (which is to say, not really at all) but had a less compromised phone to show for it.
And it’s weird, because with the old wedge-style MacBook Airs this feeling never went away for me, I loved those machines and every time I picked it up I kinda marveled, but that sensation kinda just went away with the iPhone Air, perhaps since I’m picking it up so much more than a laptop?
The screen
I’ve always been a normal-sized phone guy. The Plus/Max phones just feel unwieldy, but I do admit whenever I hold one I’m like “dang… maybe…”.
The iPhone Air is the perfect solution to this, its screen size sits right in the middle of the normal Pro and Pro Max sized phones, and is one of my favorite parts of the phone.
It’s large without feeling unwieldy (so awesome for games and videos), typing is a joy on the increased size, and it really makes me wish this size was the normal “small” Pro phone. Apple could then make the Pro Max phone 8" diagonal or something, I wanna test how far these Pro Max people will go.
As a bonus my iPhone Pro can’t fit one of those tiny Xteink readers on the back, but my Air can perfectly!
The cameras
Camera quality feels as good as ever, it’s apparently not as good a main sensor as the Pro iPhones but I can’t really tell. It still has that distinctly over-processed look plaguing modern smartphones, but using an app like Project Indigo or Halide really helps here as they have modes that heavily reduce this distinct “phone” look.
The real issue is that there’s only one sensor. I didn’t think I’d mind that much but unfortunately it turns out I do.
On one hand, the iPhone’s main sensor has worse minimum focus distance than some Android phones, which means if you’re trying to take a photo of a document or something it often ends up blurry, you have to pull back a little bit then crop in after the fact. Since the sensor is 48 MP there’s tons of room to crop in (and even a built in faux 2x lens option) but it’s just kind of an annoyance versus either having an improved minimum focus distance or auto-macro mode using the ultrawide lens like on other iPhones.
The ultrawide lens is not one I used a ton on previous iPhones, so outside of macro mode I don’t really miss it. I’m surprised though that I really miss the telephoto lens. There’s so many options where I want to see something that’s further away, like something when watching sports, or even a cool bird, and cropping in on the main sensor is such a far cry from a 5x telephoto lens.
I’m in the minority here but I really wish Apple went back to having the secondary lens on iPhones be telephoto instead of ultrawide, and it makes me sad that going to the future folding iPhone will likely mean I still don’t get a telephoto lens back.
Aside: camera plateaus have got out of control. This one rocks so badly if you try to interact with it while it’s lying down. I so prefer the Pixel style phones that have a consistent thickness across the full width of their camera plateau, because even though there’s a substantial plateau it doesn’t rock like a table with one short leg.
The speaker (yes, singular)
For the uninitiated, the iPhone Air has a single speaker up near the earpiece at the top of the phone. Pretty much every other modern iPhone (as far as I can remember) has one at the bottom as well, which means when watching video or something the audio doesn’t sound like it’s coming from one side of the phone.
I was tempted to make an analogy to watching a video with only one AirPod in, but it’s not quite that bad, you do sorta get used to it, but it being subpar never fully goes away.
What’s arguably worse though is with only one speaker the max volume is substantially lower, if you’re in an even remotely noisy environment (say, washing dishes) and you’re a little bit away from your iPhone good luck hearing things.
Battery life
Battery life confuses me. Coming from an iPhone 15 Pro which from everything I can tell was not revered for having the best battery life, I was pleasantly surprised with the iPhone Air’s battery life, it easily got me through a day where it sometimes felt the 15 Pro wouldn’t. This felt like an impossible feat given the thinness of the device, but improvements in electronics efficiency is remarkable.
As time went on though, I started to be less impressed. Entering the spring season I started to notice getting the 20% battery notification a lot more often, and now in the summer it’s only gotten worse where it’s virtually every day. According to battery stats I’m still at 96% health.
Is this an iOS regression that’s causing more battery usage? Am I just going out and on cellular more now that it’s gotten warmer? I honestly have no idea, but either way I wouldn’t call this phone a battery champion. I really long for a day where battery life is an afterthought in phones, some of the Silicon Carbide battery stuff seems really interesting here, so fingers crossed there’s some cool battery tech in the folding iPhone.
Overall thoughts
Ultimately, I love this phone, but I don’t think I’d recommend it to most people. Honestly, I’m not even sure I’d get it again over a Pro iPhone when it really comes down to it.
If a fascinatingly cool design matters to you above all else, you should go for it. That sounds superficial, but I don’t think it is. Lots of people appreciate wearing a beautifully crafted mechanical watch over a $10 digital watch that is empirically more accurate and less fussy, there’s something just delightful about impressively crafted objects. I feel like we’re gonna be looking back at this phone even in 5 years remarking at its form factor versus 2031 phones, and there’s really something to say for a phone design being that bold.
But it really does go back to that original MacBook Air that Steve Jobs pulled out of the manilla envelope. Absolutely amazing piece of engineering, as if something from the future came back proudly to show us what’s to come, but also something with enough compromises that your average person probably shouldn’t brave these waters. (Does anyone remember CoolBook?)
The Apple Watch is one of the most fascinating pieces of modern technology for me. A gorgeous screen, an abundance of sensors, and a bonkers amount of computational power in a tiny little package that fits on your wrist. It reminds me of the Vision Pro in that a good amount of the time I put it on I can’t help but smile at how far technology has come.
But it’s also weirdly something I’ve never used a great deal. Every few generations I buy a new one and try it out for a few weeks, but I inevitably run into a few speed bumps:
I just fundamentally don’t love notifications being an even more prevalent part of my life than they already are
I’m not a fan of having another device to charge daily or near daily
While I love wearing a cool mechanical watch from time to time, I’m not a fan of having something substantial on my wrist most days. I can’t help but notice it all the time (forget sleeping in it). Personality quirk I suppose
So ultimately I end up just putting it on for sports (go volleyball!) and leaving it on the charger the rest of the time, hoping one day for a device that’ll be a better fit.
There’s a new wearable in town
A few weeks ago a bunch of YouTube videos popped up showcasing a new wearable device: the Fitbit Air. I initially brushed it off assuming it would be mostly for Android users (as Google now owns Fitbit) and there wouldn’t be much possible for iOS integration. Talking to some people though, I learned there’s an iOS app that actually integrates things pretty well (its feature subset is a lot smaller than something like a smartwatch that would require a lot deeper OS integration).
So now I’m listening. On paper, it provides a bunch of handy sensors, a week of advertised battery life, all in a package that is really low profile on the wrist.
Okay, you have my interest. That was enough for me to head over to Best Buy on launch day to pick one up. (They were almost completely sold out, so there’s clearly some interest for this thing.)
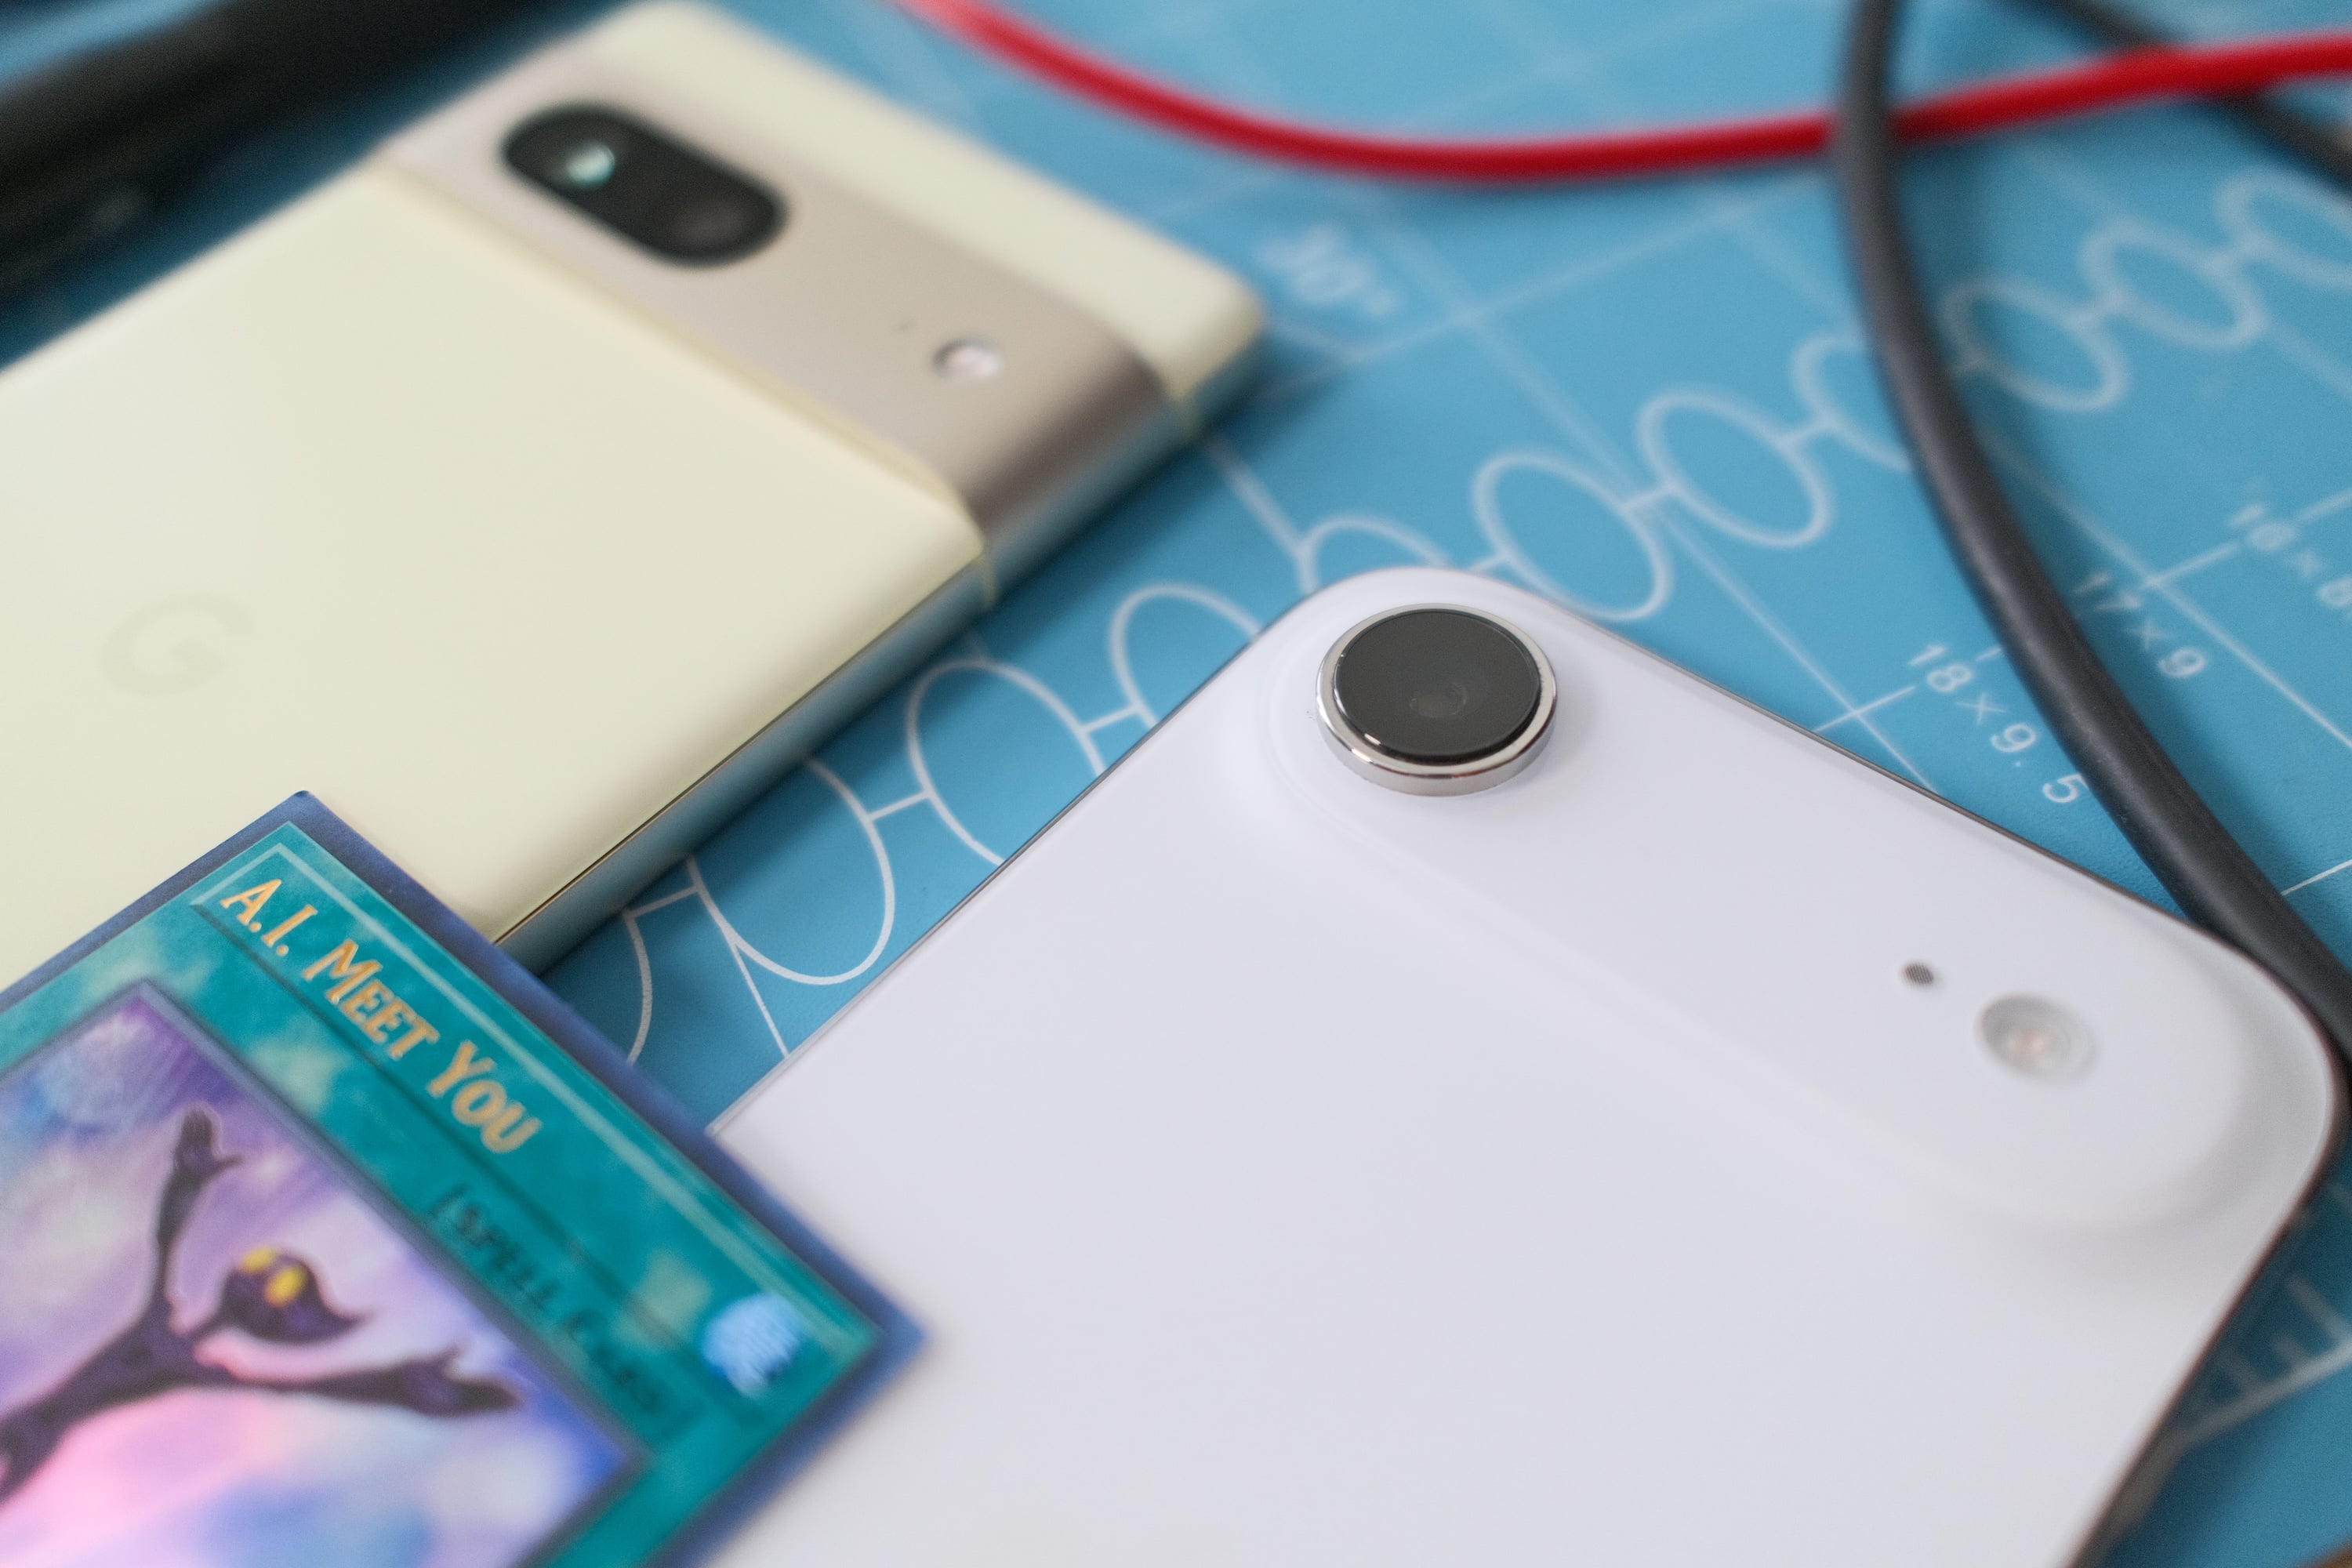
The hardware
It’s a bit bigger than it looks like in pictures, but it’s absolutely tiny compared to any smartwatch. It’s just small and sleek enough that I barely notice it’s there, sometimes I even catch myself wondering if I accidentally took it off, which is a great sign. First wearable I’ve been able to sleep in without a worry.
The actual “unit” is just a little rock sized device that slips into one of a few different bands. I have the default “obsidian” colorway and really like it visually; it has a nice style while also not being loud whatsoever, but there’s a variety of bands (and presumably more cool ones to come from the community) you can choose from.
I’ve played a few sweaty sports in it, and done a bunch of yardwork, and the band holds up better than I thought it would for fitness activities, it really seems like the default band is one you can get away with using for a variety of activities.
Battery
The claim is a week of battery life. Charging that infrequently sounds really awesome (imagine if phones could do that!) so I was really hoping that would be the reality. And indeed, it seems to be! From my estimates I’m losing around 10% per day, so a week should be pretty easy to hit.
It also charges up quite quickly. I don’t really love the idea of wearing it into the shower, so that’s a great time for me to take it off to charge, and in a 15 minute shower it charged from 44% to 85%, so taking it off for a quick charge while showering seems like a great way to keep it always topped off.
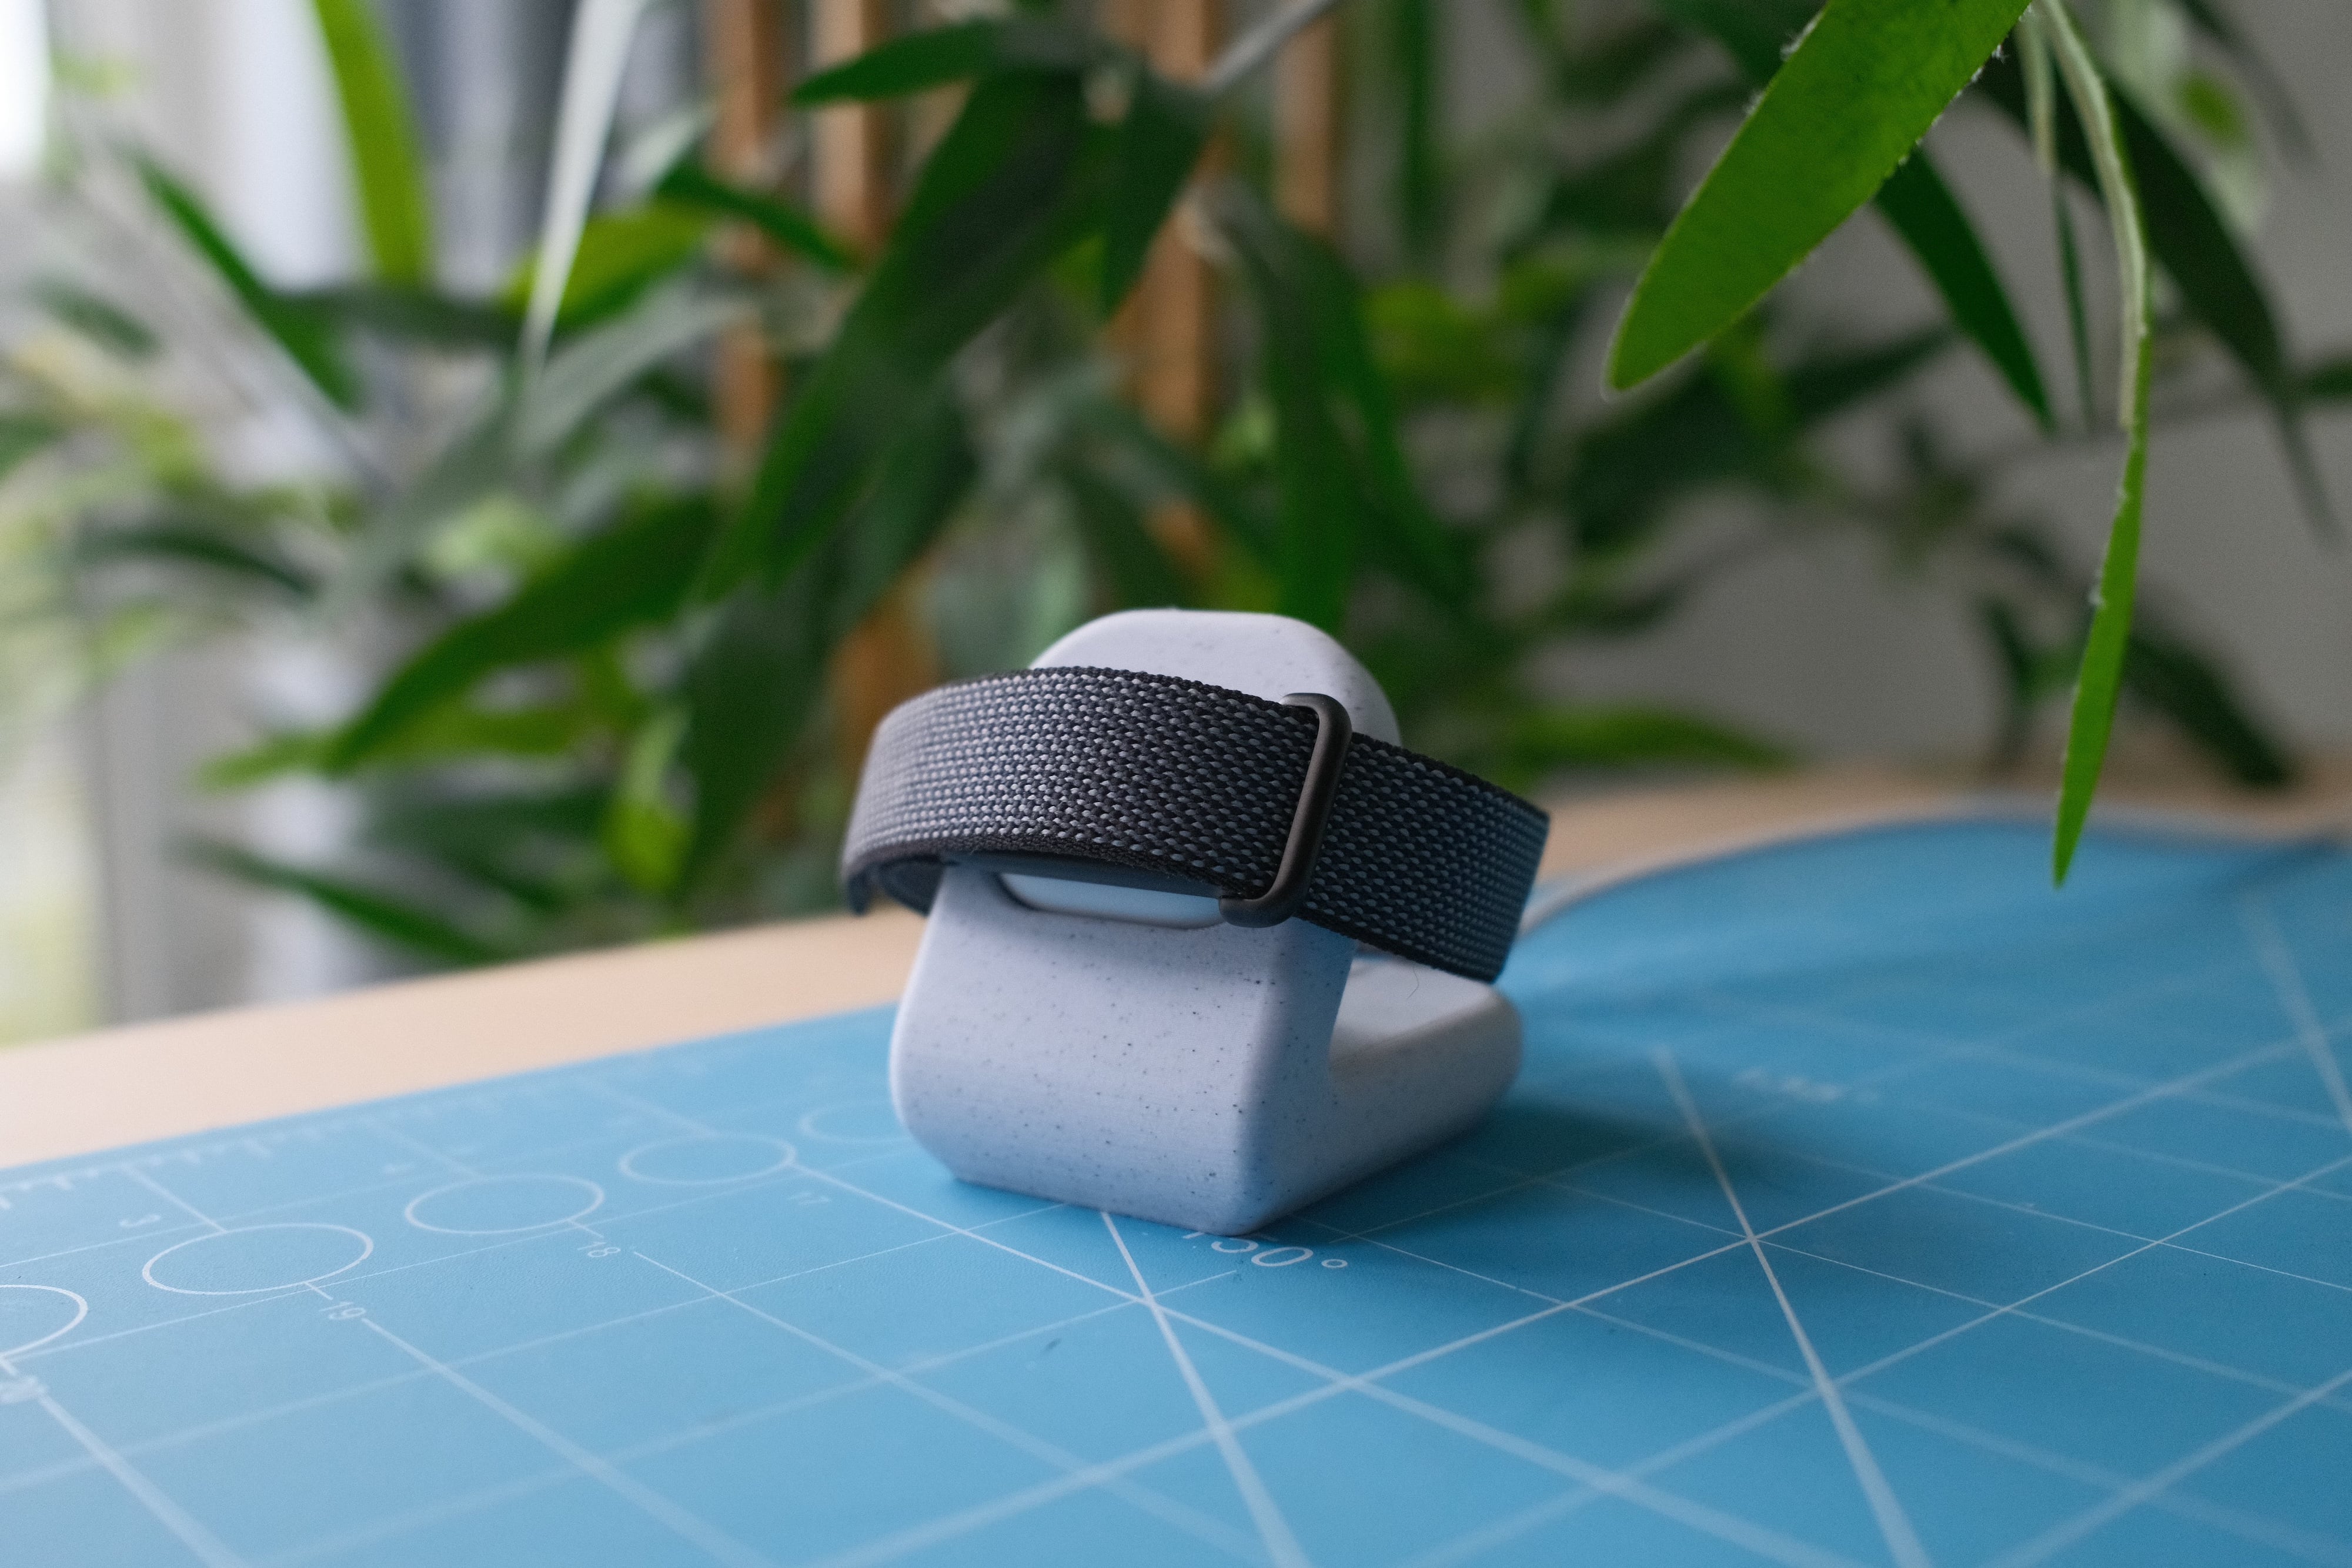
The only missing part of the charging story is a decent charging stand. By default the device connects with a little magnetic Apple Watch style charger, but I kinda want a way to just plunk it down on my nightstand into something and was kinda surprised Google doesn’t immediately have an accessory for that. To remedy this I made a quick little 3D printable stand that came out quite nice if I do say so myself! Download link if you want to grab it.
The Google Health app
The Google Health app itself is probably the most disappointing part of the equation, and a real head scratcher overall. It’s not like, offensively bad, it’s just very mediocre and I’m not sure why they didn’t delay the launch a month or something just to work on the app a bit longer.
There’s two main issues. The first is that it’s just really buggy. Sometimes tapping things does nothing, my sleep score almost always states “unable to record” until I sign in and out, at which point it’s magically available.
The other is the design. I’m not the biggest fan of Google’s software design but even this is just so boringly bland, half the time it feels like an old HTML website where the CSS didn’t load. It is so aggressively bland that it’s almost depressing. Things pop in and out like janky web views when loading. Sections just seem to bleed into each other with no solid information hierarchy (especially the AI assistant stuff). Things are aligned inconsistently. Then again, I have similar complaints about the Gmail iOS app so maybe this is just Google’s design language as a whole?
The other part is just bizarre design functionality decisions, like when selecting a workout there’s a ton of activities listed from biking to swimming to golf to tennis, if you’re looking for a specific sport, you’ll never find it, you just have to select “Sport” (aren’t tennis and golf sports??), and then after the workout is finished you can classify it as basketball, volleyball, soccer, etc. Why not just be like the Apple Watch where you can select, I dunno, the sport?
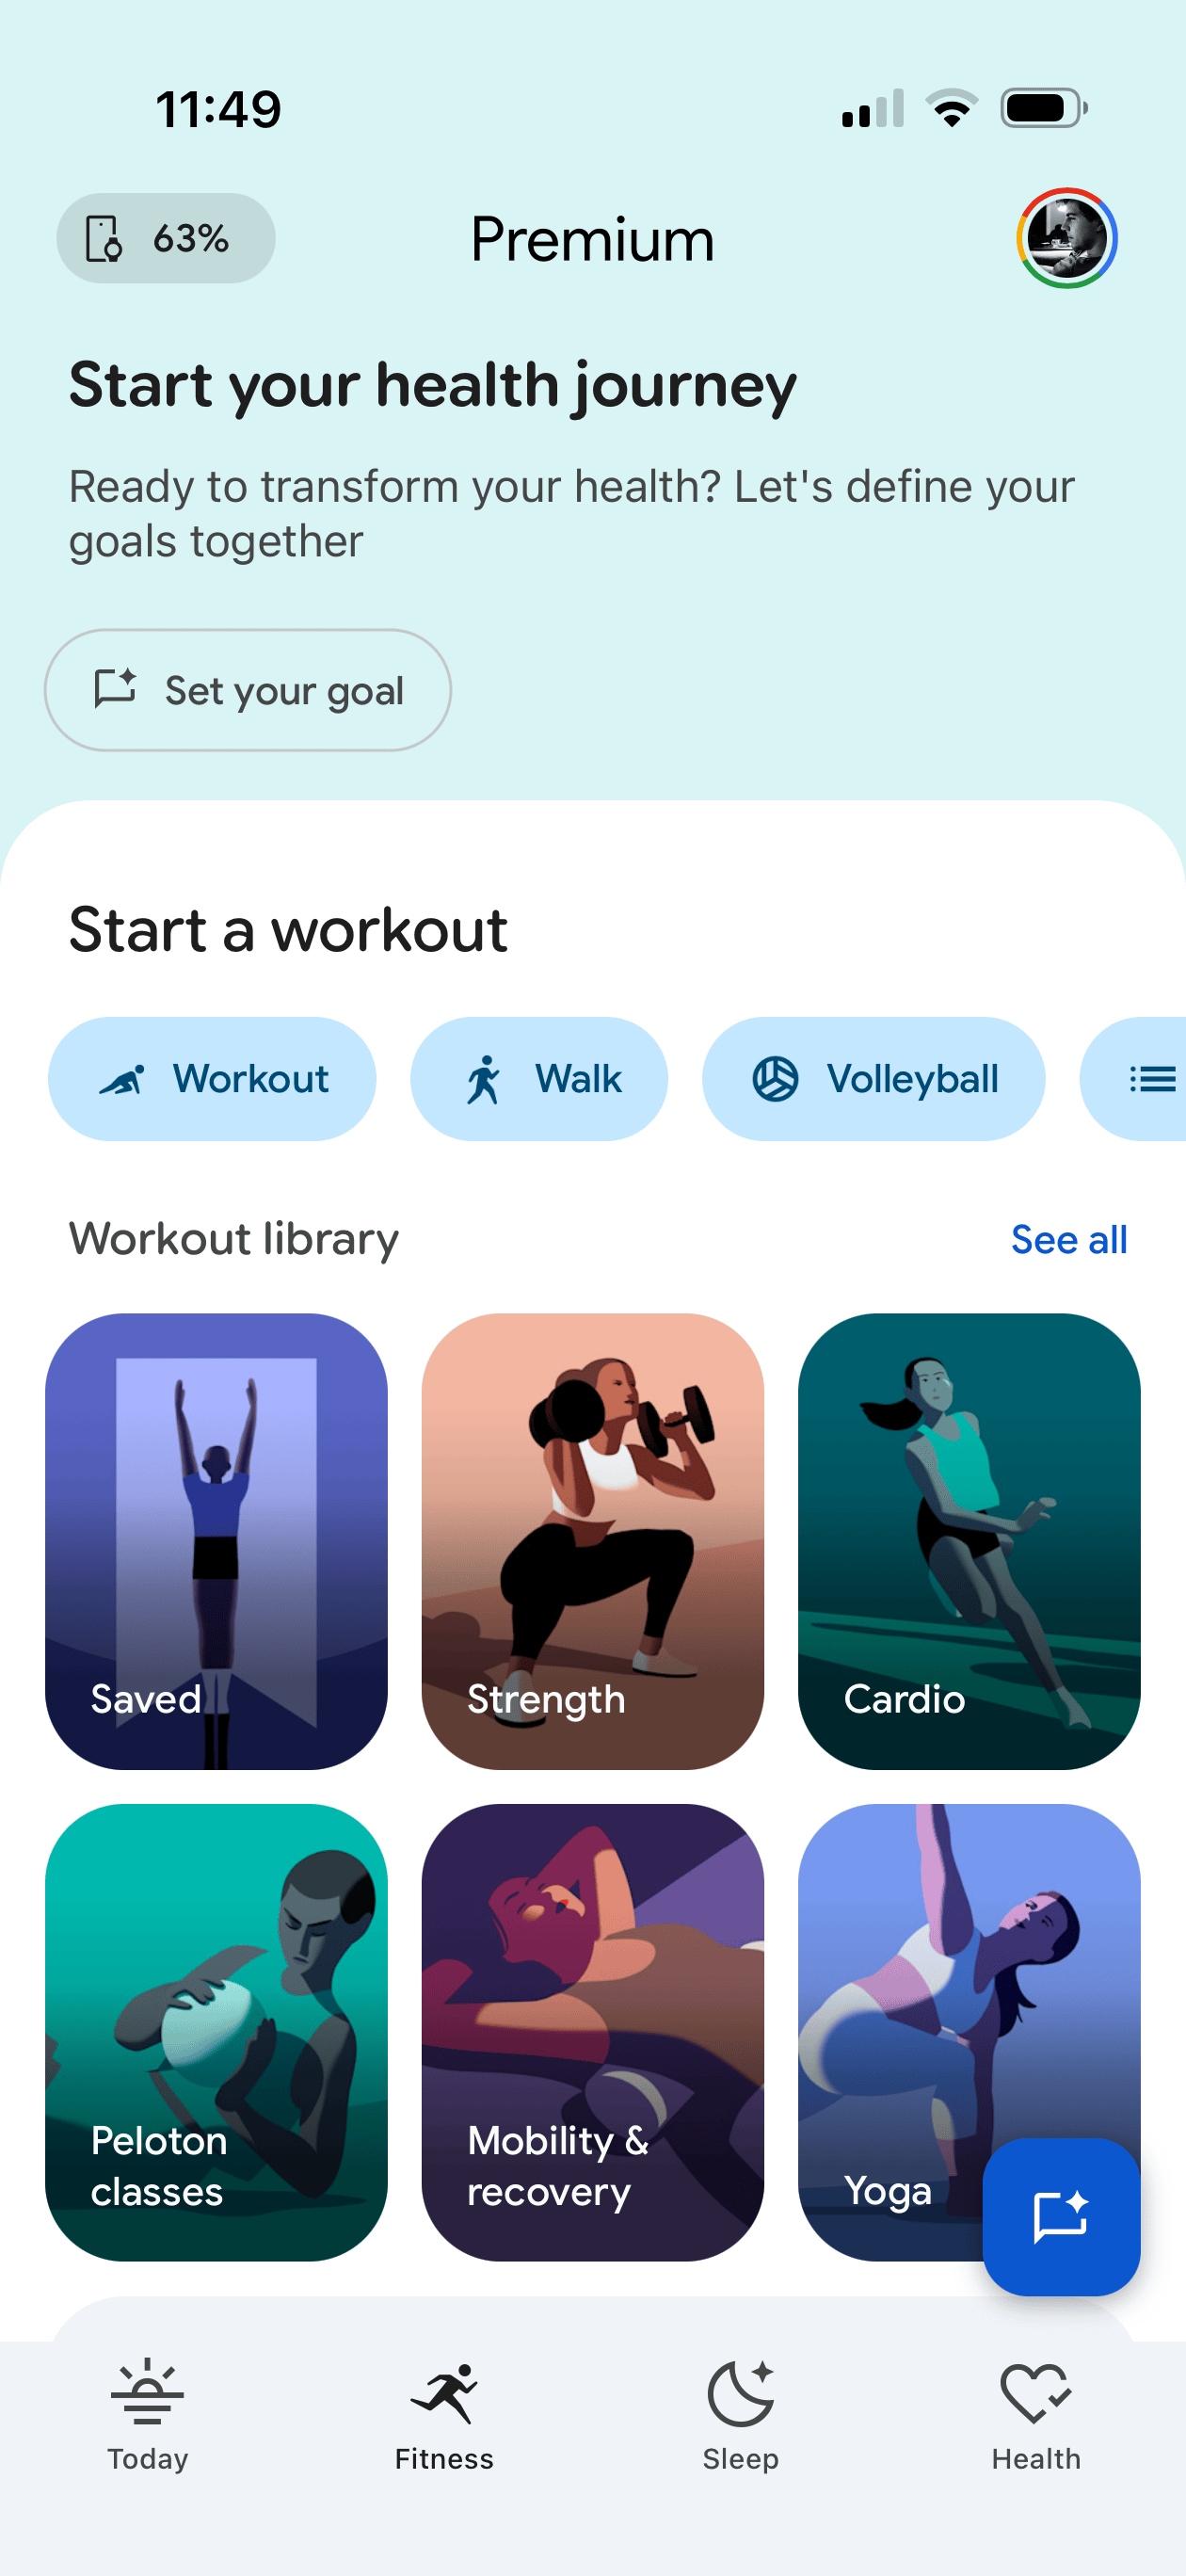
Heck if you go to the “Fitness” tab or the app (where I would think you’d easily be able to start a workout) the top 25% of the screen is a “Start your health journey” call to action that upon tapping the “Set your goal” button opens an AI chat (what?) that has been spinning for 15 seconds now with “Preparing an answer” (an answer to what??). Then there’s another 40% of the screen dominated by a library of what seem to be guided video exercises rather than again, a simple list of activities to choose from. Why? This screen should be dominated by my fitness stats and the option to start a workout. There is a teeny bar to start different workouts, with workout options such as “Workout” or “Walk”. This makes a lot of sense to me, as I often go to the shoe store and ask for “shoe”.
I’m just complaining at this point, but as it stands now my “Weekly Cardio” progress bar is 22% full, but has “Calibrating, 3 days left” in it and “+0” overlaid on the bar. How do I have any progress if the value is 0? Is the 0 something else? Why show me data if it’s not calibrated?
Okay one more complaint. My resting heart rate looks to be around 58 bpm but under “Daily Readiness” my resting heart rate is rated as “poor”. Why? If I tap on that it says “RHR typically ranges from 60-100 … active people often have lower RHR”. Why is 58-64 poor then?
It’s a bewildering app that on one hand does the job and lets you get to and see the things you want once you get used to it, but it feels like the most hodgepodged, design by committee app I’ve used in awhile. Like six different teams at Google got to do design passes on the app and kept shoehorning in things they wanted versus someone having an actual cohesive vision of what this app should be. It genuinely feels like it would be worth starting over completely from scratch. This is a minimal bracelet that is super easy to use (it just sits on your wrist), it needs a corresponding elegant, non-bloated, simple app.
The experience of using it
All that said, it’s pretty awesome to use. How do you reconcile that with complaining about software for a few hundred words? Because you don’t have to interact with the software that much, it mostly just works ambiently/automatically, and you open the app if you want to view the stats it collected. I wish that last part was better, but you learn to live with the jank.
One of my biggest issue with the Apple Watch is the whole thing around starting and stopping a workout. Call me a dummy but I’d often forget to either start or stop a workout. The watch kinda seems to try to help with this, where 15 minutes after a volleyball match on the drive home when I can’t safely interact with my watch it’ll be like “Hey I think you’re done want me to stop? Yes/No” which is not ideal. On the flip side I’ve never even had to start or stop a workout with the Fitbit Air, it just knows I was working out and nails the start and stop time, at best I have to relabel the workout to the actual sport it was, but apparently this gets better as you train it with time.
And where it’s so much less obtrusive than an Apple Watch it’s so easy to get stats on everything throughout the day and night as I just leave it on 24/7.
As for the accuracy of the stats, all seems great for me there. Sleep data seems to reflect how I feel and has a really in-depth breakdown, and fitness activity seems to track pretty nicely with what I’ve come to expect from the Apple Watch. The only weird thing I’ve noticed (and maybe it’s the case with the Apple Watch too, haven’t tested) but you can really easily/accidentally cheat the pedometer steps by just shaking your wrist (I remember doing this with cheap little pedometers in middle school) which seems weird? If you talk a lot with your hands you might have inflated step counts.
Elephant in the room: Google
Being an ads company, Google doesn’t have the best reputation with data privacy, so I can see why some are squeamish about using such a device. Me? I’m not too worried about Google having access to my step count, heart rate, sleep stats, etc. as they don’t massively feel like super personal stats, and the little bit of unease that gives me is outweighed by the utility of this device, but I totally get how someone else might feel differently.
Wishes from Google
Beyond fixing the app (please), functionality-wise the Fitbit Air seems pretty much perfect to me so there’s not a lot I find myself asking for.
One thing I really would love though is wrist notifications around phone calls. One of my favorite uses for the Apple Watch is when I’m expecting a phone call on a given day, I find even with the ringer on I’ll just miss calls from my iPhone by not hearing the ring or not feeling the vibration, but the Apple Watch vibrating on my wrist always gets through to me. The Fitbit Air has a similar vibration mechanism (used only for alarms I think right now) and if it could pair to your phone like a car can for reporting phone calls (and maybe even texts, but I’d personally turn that part off), that’d be super handy.
Do I recommend it?
I do! At $99 USD it’s a pretty handy device if you care at all about health stats. It’s not perfect (especially in the app department) but it’s honestly exceeded the expectations I had for it, so for the price and for how unobtrusive it is day to day I’m really enjoying it.
At the same time, Apple has a much better (downright impressive) reputation around data privacy, and in my eyes a lot better ability to design nice software, so I’d love to see them design a competing bracelet as an additional offering to the Apple Watch ecosystem. I’m not sure what more in terms of OS integration they’d be able to do that would move the needle that much, but I’d just love to see Apple’s spin on such a device and I’d feel a bit better about the data privacy angle.
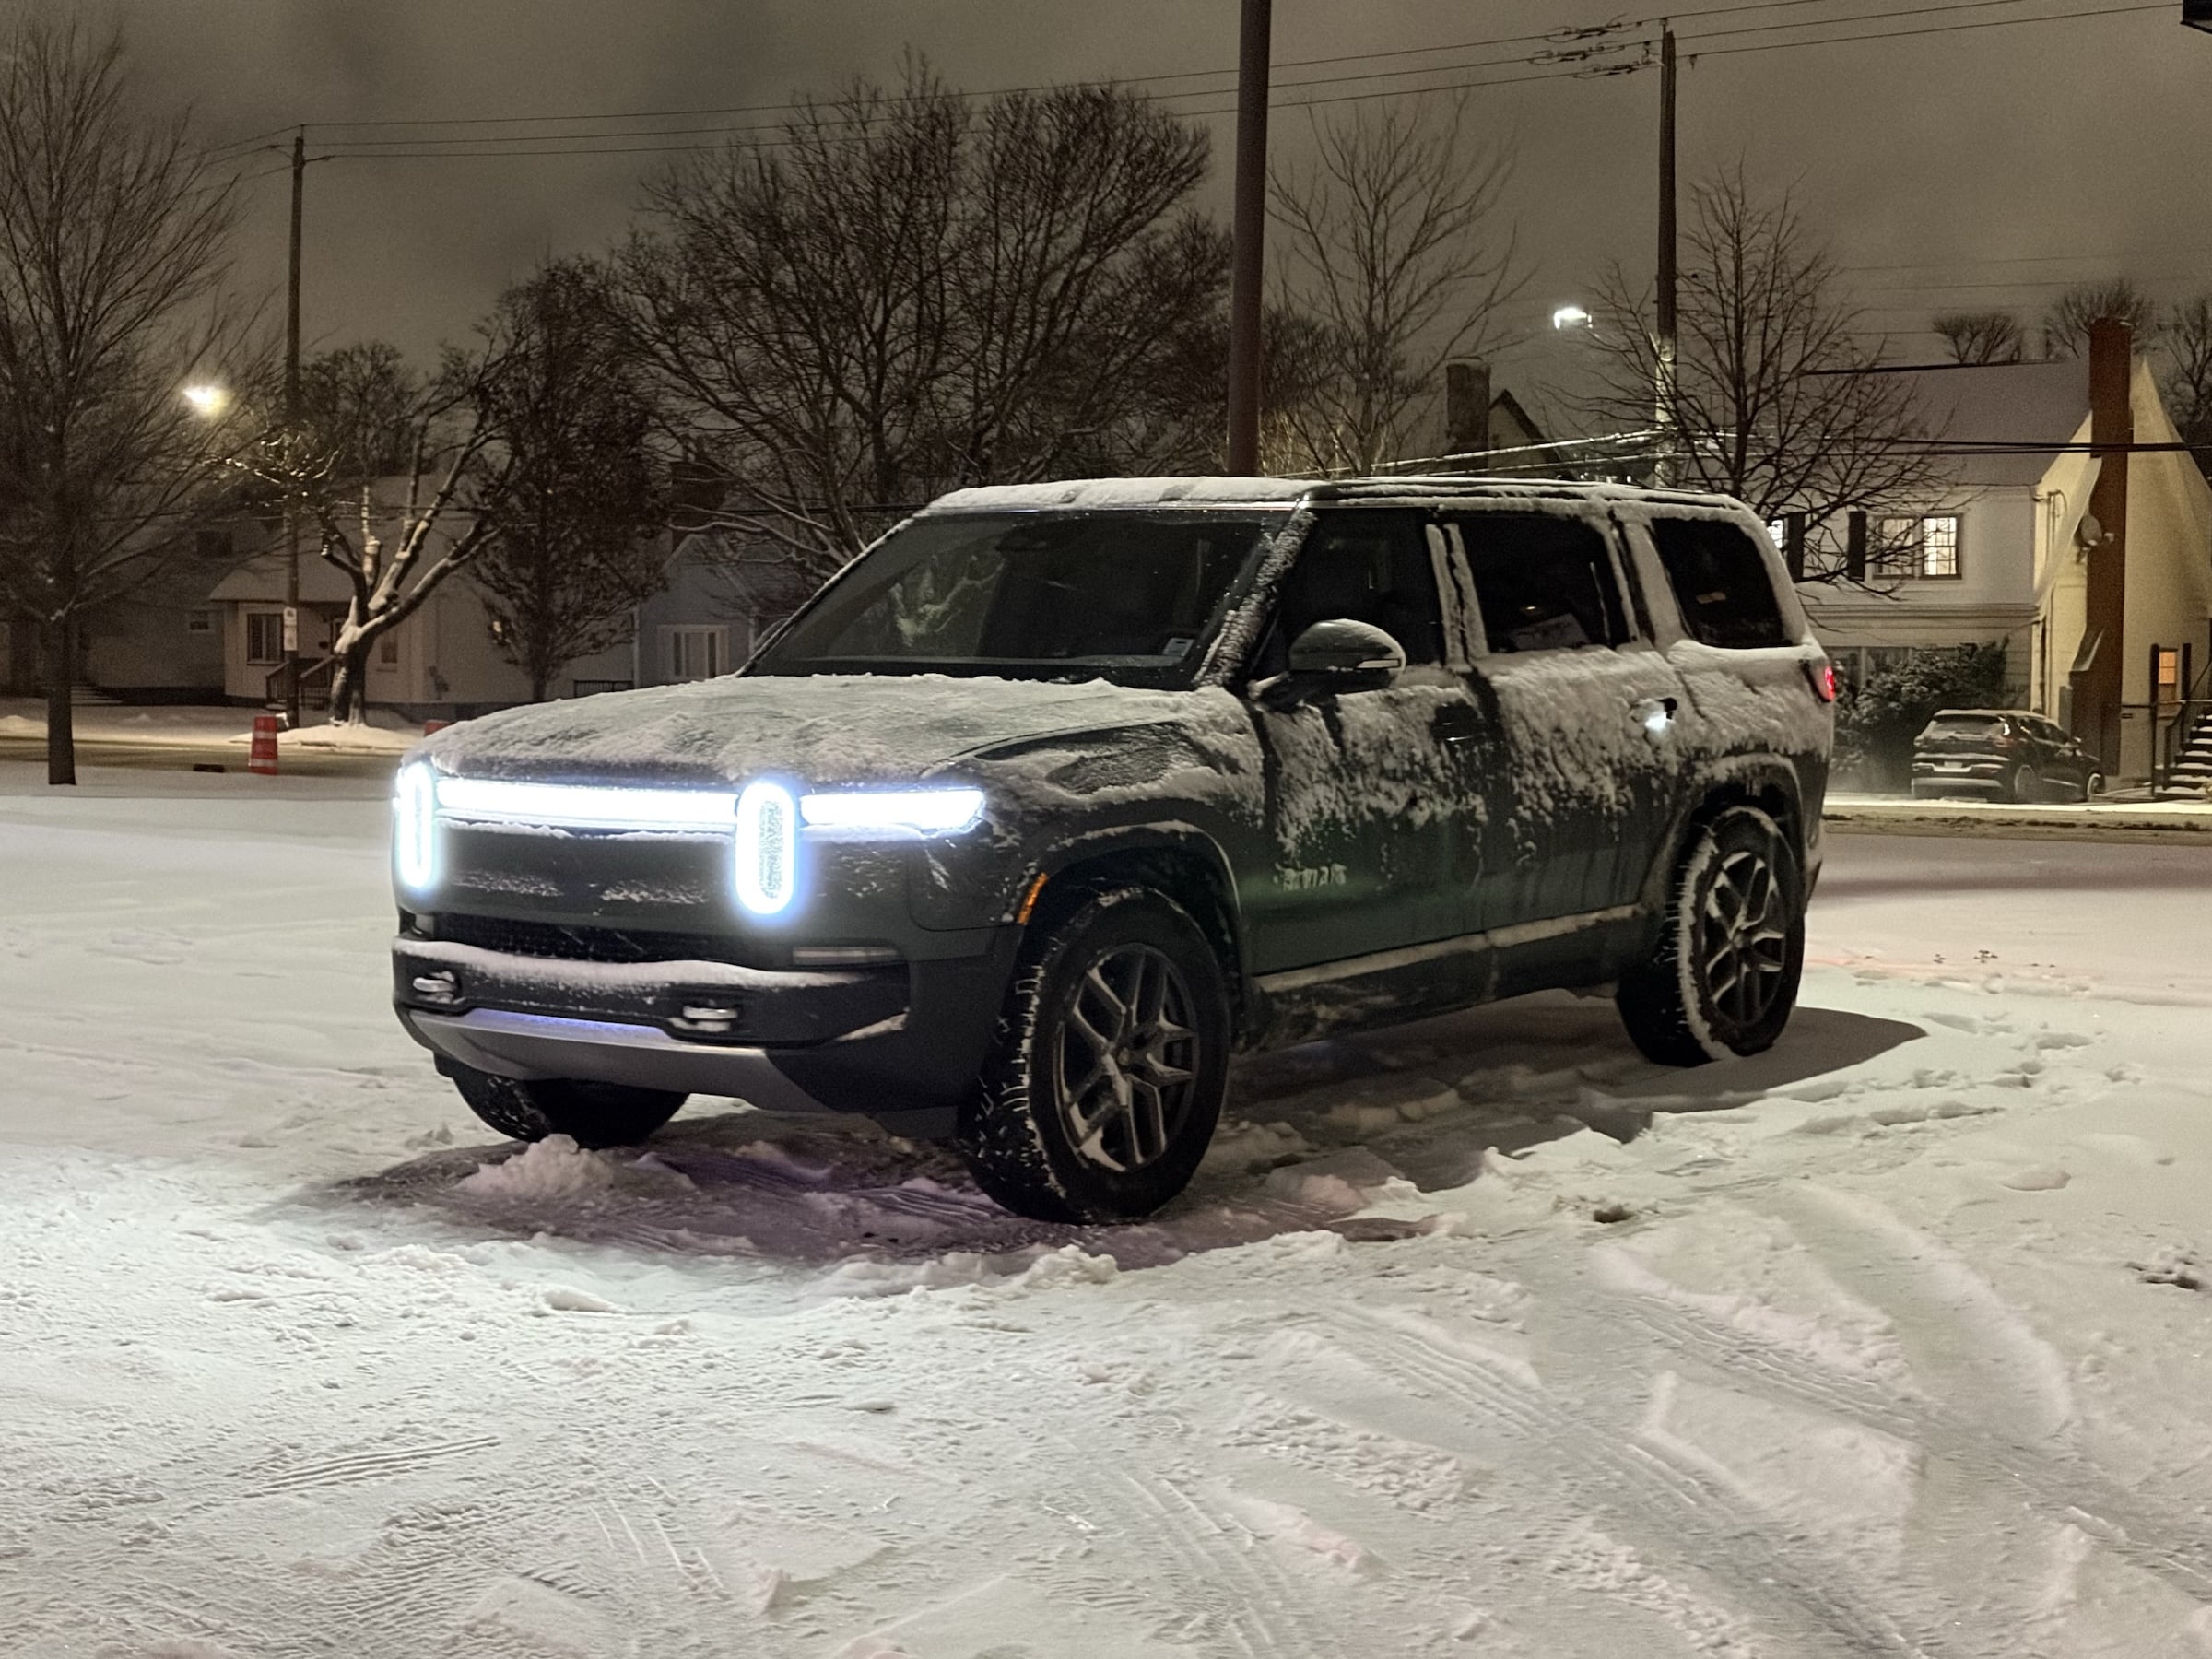
After 7 years with a Tesla Model 3, we picked up a gen 2 Rivian R1S in April of 2025. We still have the Model 3 as a second vehicle, but it’s been really cool experiencing a new electric vehicle from a very passionate new company.
2026 is a really exciting time for Rivian, as in the first half of this year they’re launching their R2 vehicle - a smaller, less expensive SUV offering that should have a lot more mass-market appeal.
With a bunch of jourrnalists getting previews of the vehicle today, I thought I’d share what I’m really hoping for in this new vehicle having experienced their existing vehicle for almost a year, and a Tesla for the better part of a decade. None of these are in any particular order.
Better audio
We sprung for the “Premium Audio” package in our R1S and… it’s not premium at all. Whatever system just came with our Model 3 sounds demonstrably better, from where it feels like the sound is coming from (much more expansive) to the bass, the R1S just feels a lot weaker. Honestly for the base audio system it would be probably decent, but for a “Premium Audio” system it just falls short. They have been making it better and better with softwware updates of all things over the course of our vehicle’s life, where it’s noticeable better now than it was at the beginning, a recent update in December basically sounds like they figured out how to turn on the subwoofer in the trunk a little bit, but it’s still just not that much.
With the Tesla sometimes I’d park and finish out a song before leaving the car because it just sounded so good, have never had that happen in the Rivian so I hope they bring some of that experience to the R2 even through another “Premium Audio” package for those who care.
No dual motor EPA shenanigans
So our R1S is dual motor, meaning it has a motor for the front wheels and a separate motor for the back wheels, meaning you get AWD. Rivian allows you to get more range by only using the front motor, turning it into effectively a front wheel drive vehicle and as only one motor is active you get a bit better range (about 10%). Sounds great, right? Choose between more efficient front-wheel drive on trips, but just use AWD around town by default.
Well, the devil is in the details. In order to be able to market this slightly improved range, the EPA requires Rivian to automatically revert back to this front wheel drive/higher efficiency mode after a few hours. Kinda like gas vehicles and how they turn off the engine at traffic lights, and if you disable that it just keeps turning itself back on. So even if it’s the winter and you’re like, “Dang, roads are a little dicey, I want to be in AWD”, if you park the car for awhile and forget to set it to AWD, it just reverts to front wheel drive. It’s like if your iPhone kept reverting to “Low Battery Mode” every 2 hours even after you keep toggling it off so Apple could advertise that model having 10% better battery life.
Note: the vehicle isn’t hard-locked to front wheel drive in this mode, if it slips it alerts you that it’s switching over to AWD (I don’t want to wait for it to slip), and if you floor it on the highway for instance it’ll engage the rear motors for extra grunt, but because it has to link up the rear motors to an already moving system, you can sometimes get a kinda weird clunk feeling as the rear motor connects itself at speed which isn’t very satisfying. It almost feels like a wheel slip in the rain.
This is maddening, and is only the case on their dual motor vehicles. For tri and quad motor vehicles, they just don’t market them as having that extra 10% range, so all the modes are actually sticky! If you say “front wheel drive mode” (they call it “Conserve”) it stays there indefinitely, if you say “AWD mode”, it stays there indefinitely.
Is this dumb? Yes. Do I blame the EPA? Yes. Do I also blame Rivian? Also yes, they’re making this trade off to be able to market extra range.
If Rivian does this same stuff for the R2 dual motor just so they can advertise a few extra miles, I really hope they have a $10 option you can configure when you order called “Give me less marketed range with no actual range decrease but have the vehicle actually do what I tell it to”, but maybe with a catchier title.
Spare compact tire
Our Tesla lacks a spare tire of any sort, instead electing to include a repair method and roadside assistance. A few years back a nasty pothole absolutely destroyed the sidewall of one of our tires on a drive home, and where it was sidewall damage it simply wasn’t repairable, so we had to call Tesla roadside assistance. Unfortuantely Tesla roadside assistance was absolutely useless, taking ages to respond and then ultimately not having any providers in the area, so we just ditched the car and got a ride home with a friend and dealt with it the next day.
After that I was like “I do not want another vehicle without a spare tire on board”.
With our R1S on the other hand, we had another unlucky event where we popped a tire (also the sidewall if you’d believe it, I have some great luck) and sure enough, since we elected to get a compact spare tire it was super easy to deal with, just grab the included jack, throw the compact spare on, then the next day we just slowly drove over to a shop for a new tire. Completely uneventful.
I was worried with the smaller body that you wouldn’t be able to in the R2, but Jerry Rig Everything showed room for a compact spare in the sub trunk, nice!
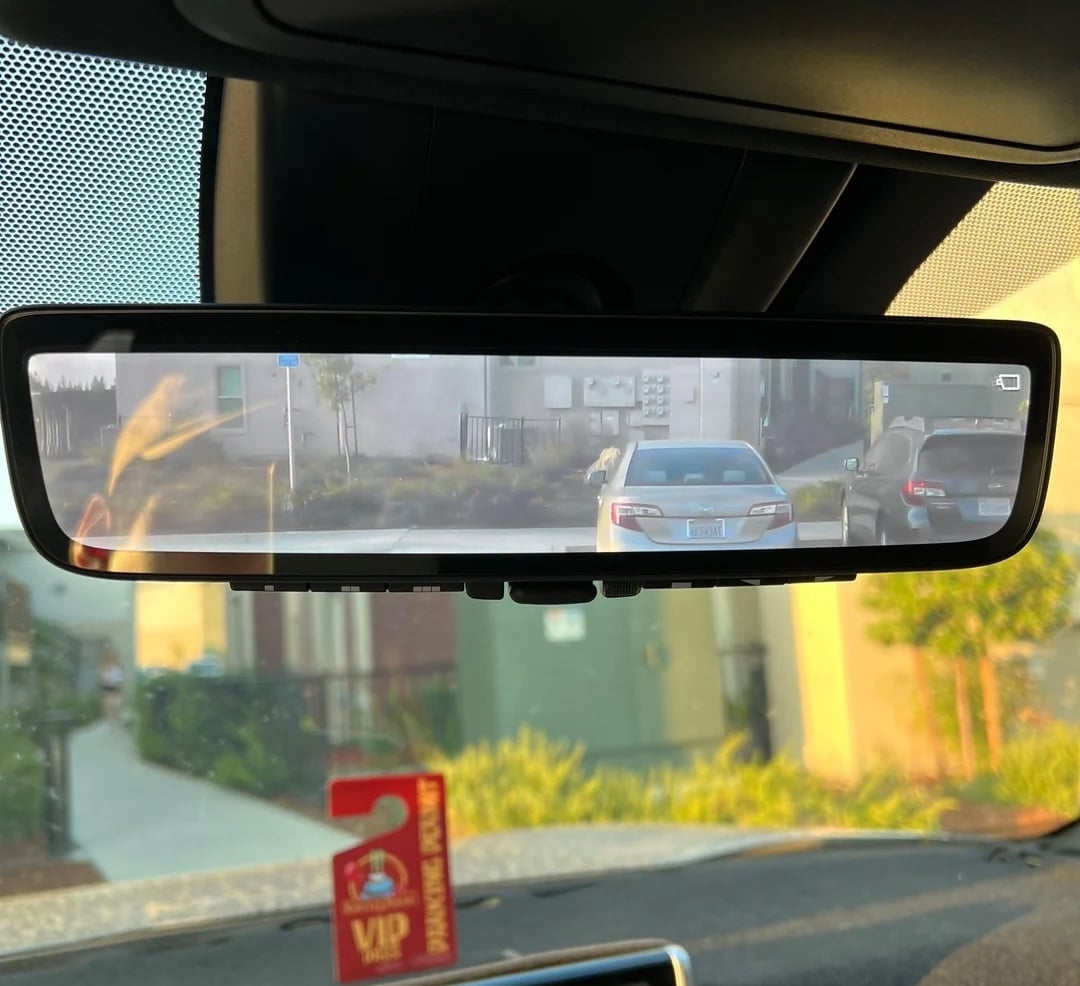
Digital rear view mirror
I don’t see this in any of the videos so it seems unlikely but I’m holding out hope it’s an option.
Picture this: you approach your vehicle, since it sees it’s your phone it knows who you are, so it positions your seat, steering wheel, mirrors, Apple Music/Spotify account, and temperature preferences. You didn’t have to do a thing, the vehicle is just smart! Except… your spouse is 7 inches shorter than you so when you look in the rear view mirror you’re staring at the back seat.
Is having to adjust your rear view mirror a big deal? No, but having the vehicle do everything else for you almost draws more attention to the final thing it’s missing that you still have to adjust every single time. This is a solved problem in inexpensive vehicles, just have a “digital rear view mirror” that requires no adjusting as it just shows a camera feed of the rear of the vehicle where the mirror is.
Digital rear view mirror in a RAV4 by u/MildSpaghettiSauce
Rivian’s cameras are legitimately so good, that at night it’s easier to use them for side blind spot monitoring when you change lanes than the actual side mirrors, because they let in enough light that you can actually make out details through the pseudo “Night Mode” camera vision that you can’t with the mirrors alone, it’s wild. I want that for the rear view mirror too!
Do you still prefer an analog mirror? That’s totally cool, all the vehicles that offer this let you just toggle back to a good ol’ reflective mirror. No harm no foul.
V2H story
Not a lot of people realize one of the most powerful part of EVs: they’re mobile powerstations that can (theoretically) power your entire home. Take a Tesla Model 3 for instance, it has a 75 kWh battery. Tesla also sells Powerwalls to help you back up your home, each Powerwall is around $6,000 and has 13.5 kWh of battery capacity. Yes, that means your Model 3 is the equivalent of more than 5 Powerwalls, or $33,000 in equivalent batteries.
That’s nuts! Ever have a power outage? With the average home in Canada using about 30 kWh per day, that could power your house through potentially multiple days and genuinely save lives.
My Rivian R1S is a lot better than my Tesla here in that it actually has normal, 120V AC outlets, but they can only output a measly 1.5 kW, so even powering a hungry kettle could result in the breaker tripping. Much better than the max 120W my Tesla can do through a 12V cigarette outlet (good god how is that the best they can do), but it’s still not enough output to power a house effectively.
It’s kinda like being in a drought with a massive water tower, but water only comes out in drips. Better than nothing, but we need output speed too.
The R1 can output much more by pulling DC energy directly from the battery through CCS protocols like the ISO 15118 standard, and sure enough despite Rivian not talnking about it, folks with these systems have been able to connect the R1S directly to their house with the appropriate cable and send up to 24 kW to power their entire home, crazy stuff, hope Rivian talks about this more in the future as clearly the vehicle supports it even if they are quiet about it.
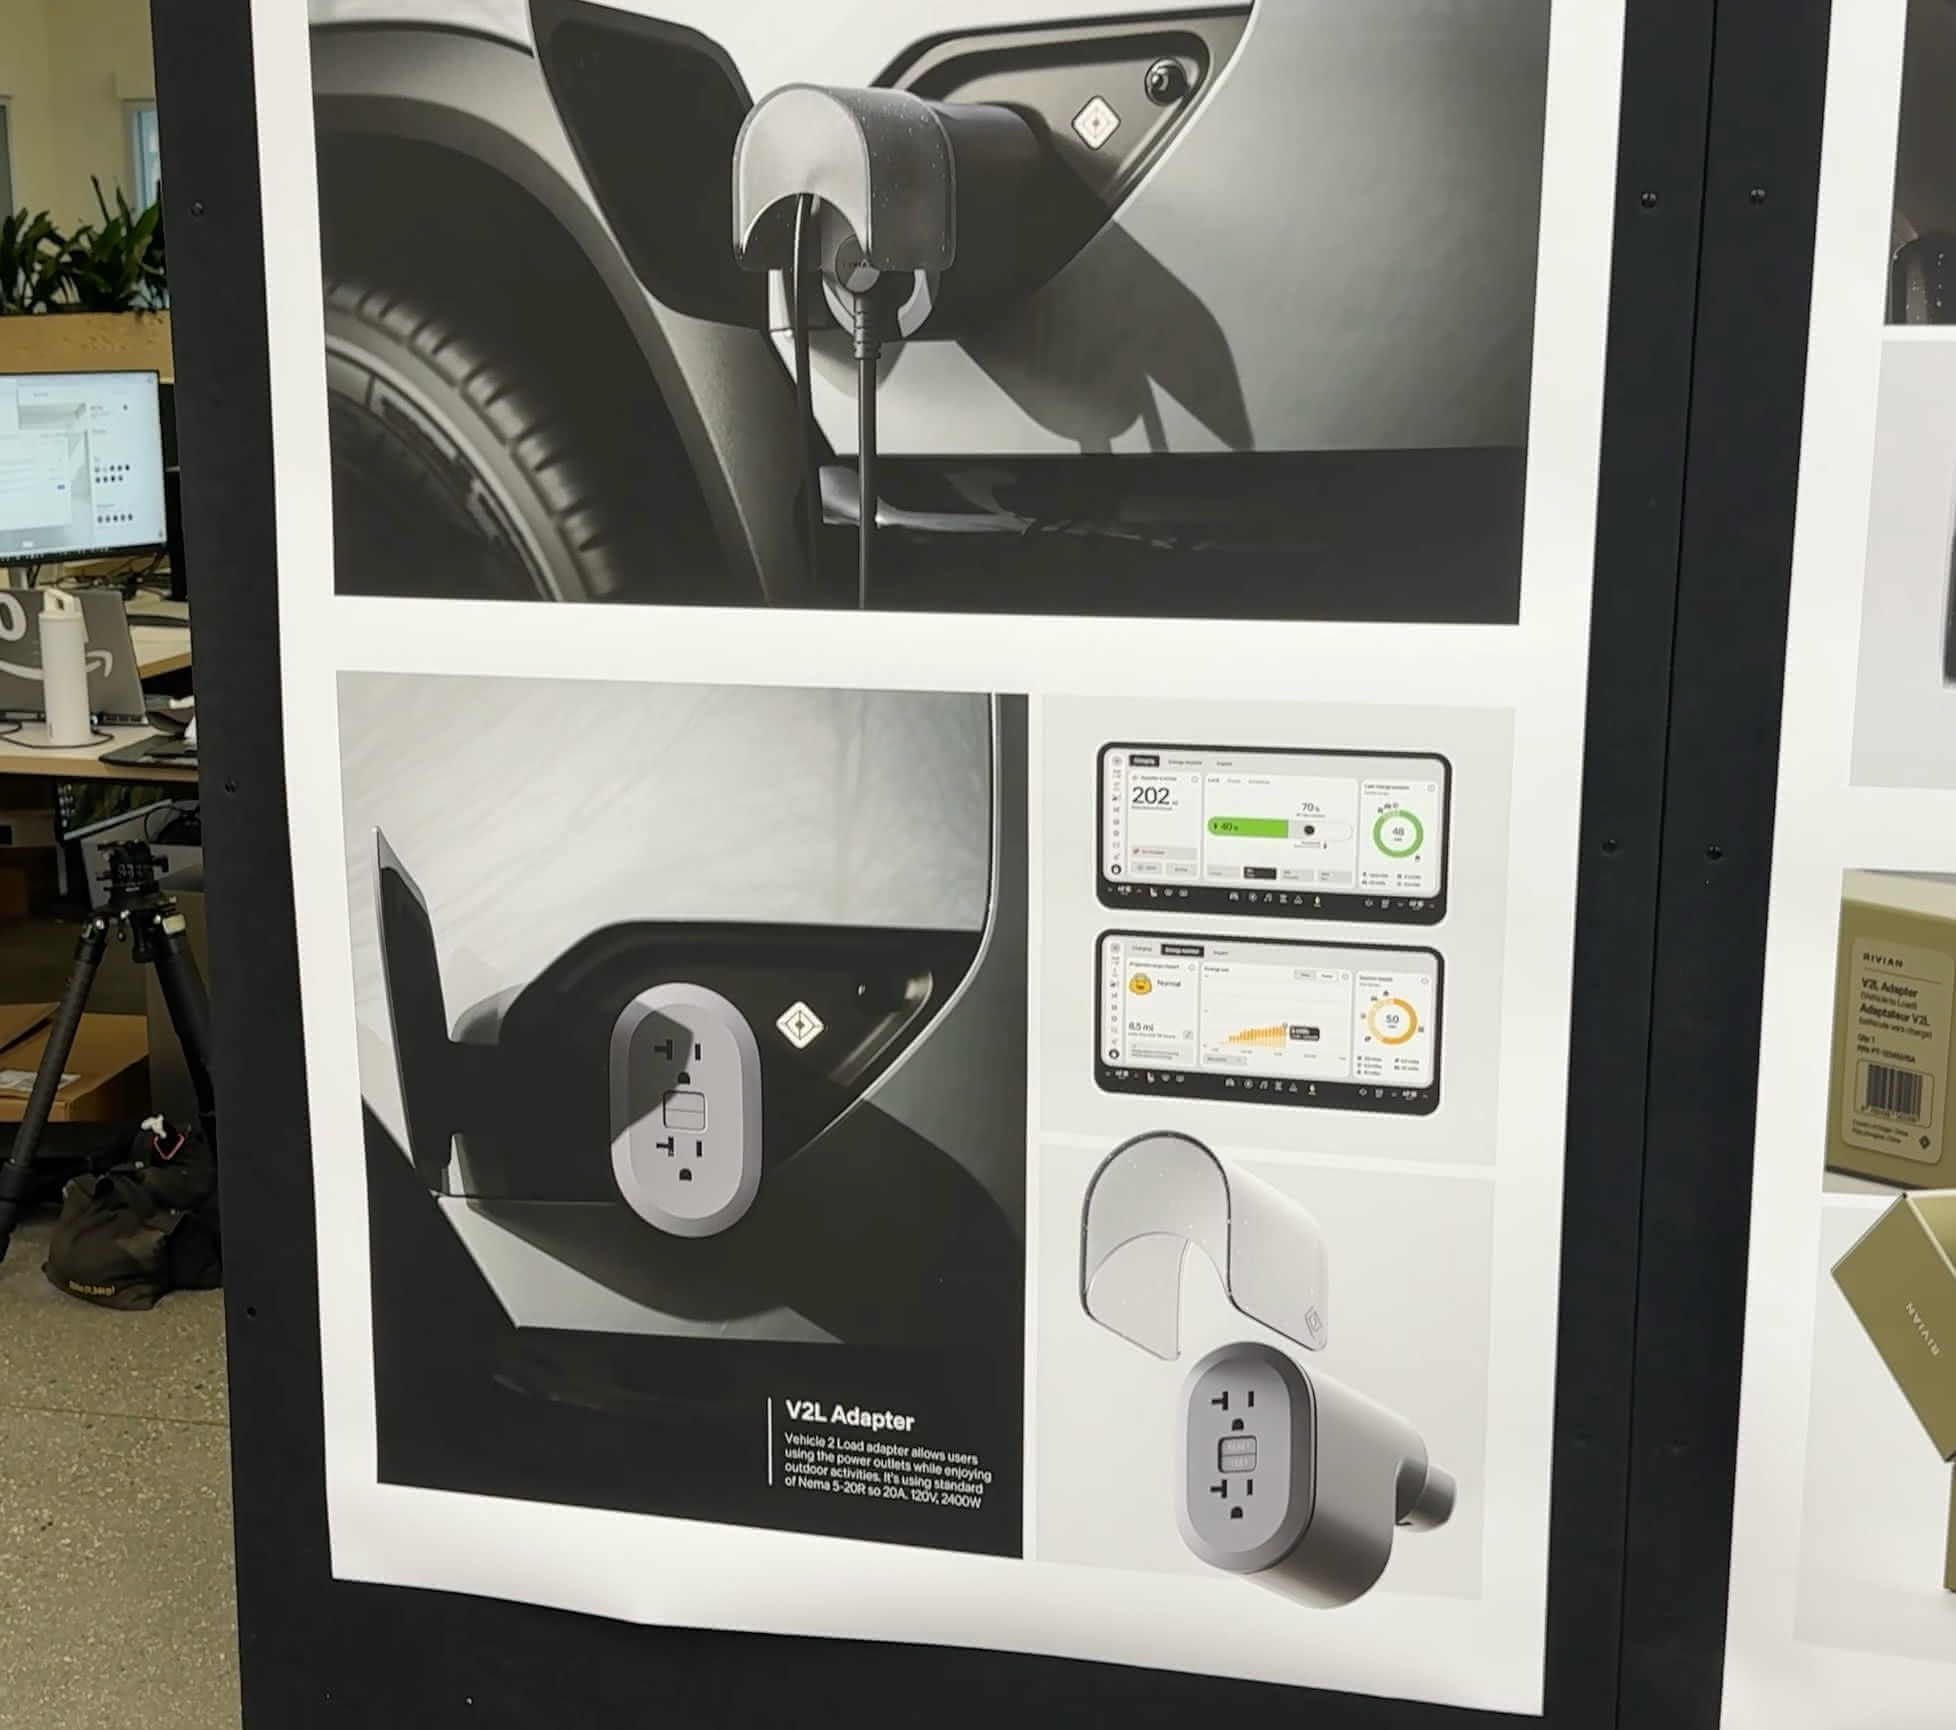
I’m kinda curious what the R2’s story is here. The CEO of Rivian said in an interview (~1:20:20) that the R1 and R2 both have bidirectional EV charging in the realm of 20 kW (which again we’re finally seeing folks be able to take advantage of in the R1 recently), but unlike being limited to 1.5 kW of AC output in the R1, the CEO says the R2 will be able to do “10 or 11 kW”.
That’s massive versus the 1.5 kW the R1 can do, but I’m not sure that made it to production in the end? Doug Demuro showed a Rivian graphic with a V2L adapter (at 26:22) but it’s only listed as 2.4 kW. Still a lot better than 1.5, but a far cry fro the 10 or 11 kW that RJ Scaringe said earlier.
Either way, talk more about this Rivian! This is one of the coolest parts about EVs!
Better suspension
The R1S has a fancy air suspension, so picture a bagpipe over each corner of the vehicle that lets it inflate or deflate to change the height of the vehicle and theoretically make for a cushier ride.
I say theoretically because honestly I find the gen 2 R1S kinda rough suspension wise. Like, hitting the same potholes around where I live in the Tesla Model 3 (with a much simpler coil suspension, no bagpipes) versus the Rivian R1S I honestly find the Tesla makes me wince less. I thought it might have been the massive 22" wheels that came on the Rivian and the correspondingly small sidewall on the tire, but we switched to a 20" wheel for the winter with a much larger sidewall and it’s better but still not great.
Would love to see Rivian tune this so that the R2 is a super smooth ride, I’ve heard the newer Tesla Model Ys are incredible here and also just have a coil suspension like the R2 will have.
Faster charging
Brands love to brag about maximum charge speeds, our Tesla for instance got a software update to enable 250 kW charging, which is super fast. To put that in perspective, most new homes in North America have 200 amp service going into their home, 250 kW is the equivalent of upgrading to 1,000 amp service, and then pouring every drop of that power into your car.
But, while that top speed is impressive, it holds that for like, minutes maybe before crashing down to much slower charging speeds. Our R1S is no different here, with good peak speeds but it doesn’t exactly hold them super well, there’s been tons of reports that the cooling method for the batteries in the R1S is just underwhelming, where the Rivian R1 models have a two battery packs stacked on top of each other with a single liquid cooling plate in the middle (so only the top or the bottom of the battery is touching the cooling surface), and that single plate often seems a little underpowered for cooling such a massive pack quickly. Kinda like thermal throttling in laptops! We typically see around 45 minutes for the battery to charge 10-80% at fast chargers.
The R2 on the other hand appears to be moving to a smarter cooling method where the cooling liquid flows almost through a ribbon, weaving along the sides of each cell in the battery pack, meaning a lot more cooling surface area.
And indeed, this seems to have paid off, with a Rivian employee saying they’re now under 30 minutes for 10-80% on the R2. Class-leading? No, Hyundai is under 20 minutes, but a fair bit better.
And for folks without EV experience, honestly, this is mostly a non-issue. 99.5% of your charging is done at home where speeds don’t matter (it just charges overnight like your phone), it’s only if you’re going on a bit of a roadtrip where this comes into play.
Better USB-C
Okay this isn’t a big deal, but the R1S has a ton of USB-C ports everywhere, like there must be close to a dozen, which is awesome, but if you try to charge a power bank or a laptop or something over USB-C it’s just… not very fast. I haven’t actually measured but I’m assuming they’re only doing 12V (at most) instead of at least 20V which most chargers are at nowadays, which I really hope they improve. My MacBook charges so slow.
Better phone charger
This is the one part of the Rivian that I’m like “how did this even make it out of the factory”. And if you’d believe it the phone charger in my vehicle is the second revision, so this is their attempt at fixing it somehow.
Basically they have a flat little area near the arm rests where you can place one or two phones to have them wirelessly charge. Sounds fine, right?
I haven’t measured it, but from experience I believe the charging “sweet spot” is approximately 4 atoms wide. If the car is in motion at all, it moves from those four atoms and tries super hard to charge it but ultimately cannot, and just making the phone get super hot and lose a bunch of battery life.
One time we went camping and I was like “Okay, the vehicle is not moving, surely I can just set it here while I sleep and it’ll charge”. Nope, somehow even stationary the phone did not charge beyond 20% overnight and was super hot in the morning. What.
They have managed to make a phone charger that is worse than not having one at all. I can’t even place my phone in the arm rest while I drive because it just cooks it, at least if nothing was there it could just be a storage location.
No, mine is not broken, this is a common complaint from just about every Rivian owner, and they need to make this better for the R2. Just hot glue a MagSafe puck in there at minimum.
Better Phone as a Key (PAAK)
Rivian and Tesla do the (honestly very cool thing) where it uses your phone to detect your proximity to the car and lock/unlock it and recognize who the driver is to set preferences. It’s great, no having to carry around bulky car keys (don’t worry, there is a backup little credit card style key you carry in your pocket in case your phone dies or disappears).
Rivian even recently updated theirs to use the first-party “Apple CarKey” functionality so you get bonuses like being able to unlock it for a few hours even after your phone’s battery died, and it uses “Ultra Wide Band” (UWB) so it can position your phone in relation to the car down to the centimeter. Tesla doesn’t do this and has their own proprietary thing that I think is based on Bluetooth but might use a bit of UWB on newer models (not on my car).
But… Tesla’s is still much better. There’s two aspects of nailing good “phone as a key” support: firstly, unlocking the car as you approach (duh), and secondly, knowing who approached the car so you can set their preferences (seat, steering wheel, mirror positions, temperature preferences, music streaming account, etc.)
Unlocking: B+ for Rivian here, sometimes even with the recent update I have to stand by the door for a few seconds and be like “Um, hello” before it sees me there and unlocks. Same phone, walk over to my Tesla, always unlocks instantly even though the Rivian should have a massive advantage with UWB.
Identifying driver: D for Rivian here. Again, with UWB and centimeter-level positioning over the driver in relation to the vehicle Rivian should be able to know exactly who is approaching the driver door when my girlfriend and I (who both have Rivian keys) approach the vehicle, but 95% of the time when my girlfriend is with me (despite her always preferring to be passenger) it always sets her as the driver. Even weirder, sometimes she’ll yell out the window if I’m putting something in the frunk “Oh it actually recognized you this time!” with me set as the profile, but then when I sit down in the seat it reverts to her. What.
Rivian needs to do better here for the R2. The pain is especially compounded by the fact that if you leave in a bit of a rush and somehow don’t realize the driver profile is wrong, Rivian won’t let you change your driver settings unless you slow down to under 3 mph, so you better get ready to pull over and stop the car if you need to adjust something. With Tesla you can always just swap profile and have your steering wheel, seat, mirrors, etc. move to where they should be, and that feels a lot safer than having to muck around with changing things via a touch screen or sit their tweaking controls on the side of the car seat.
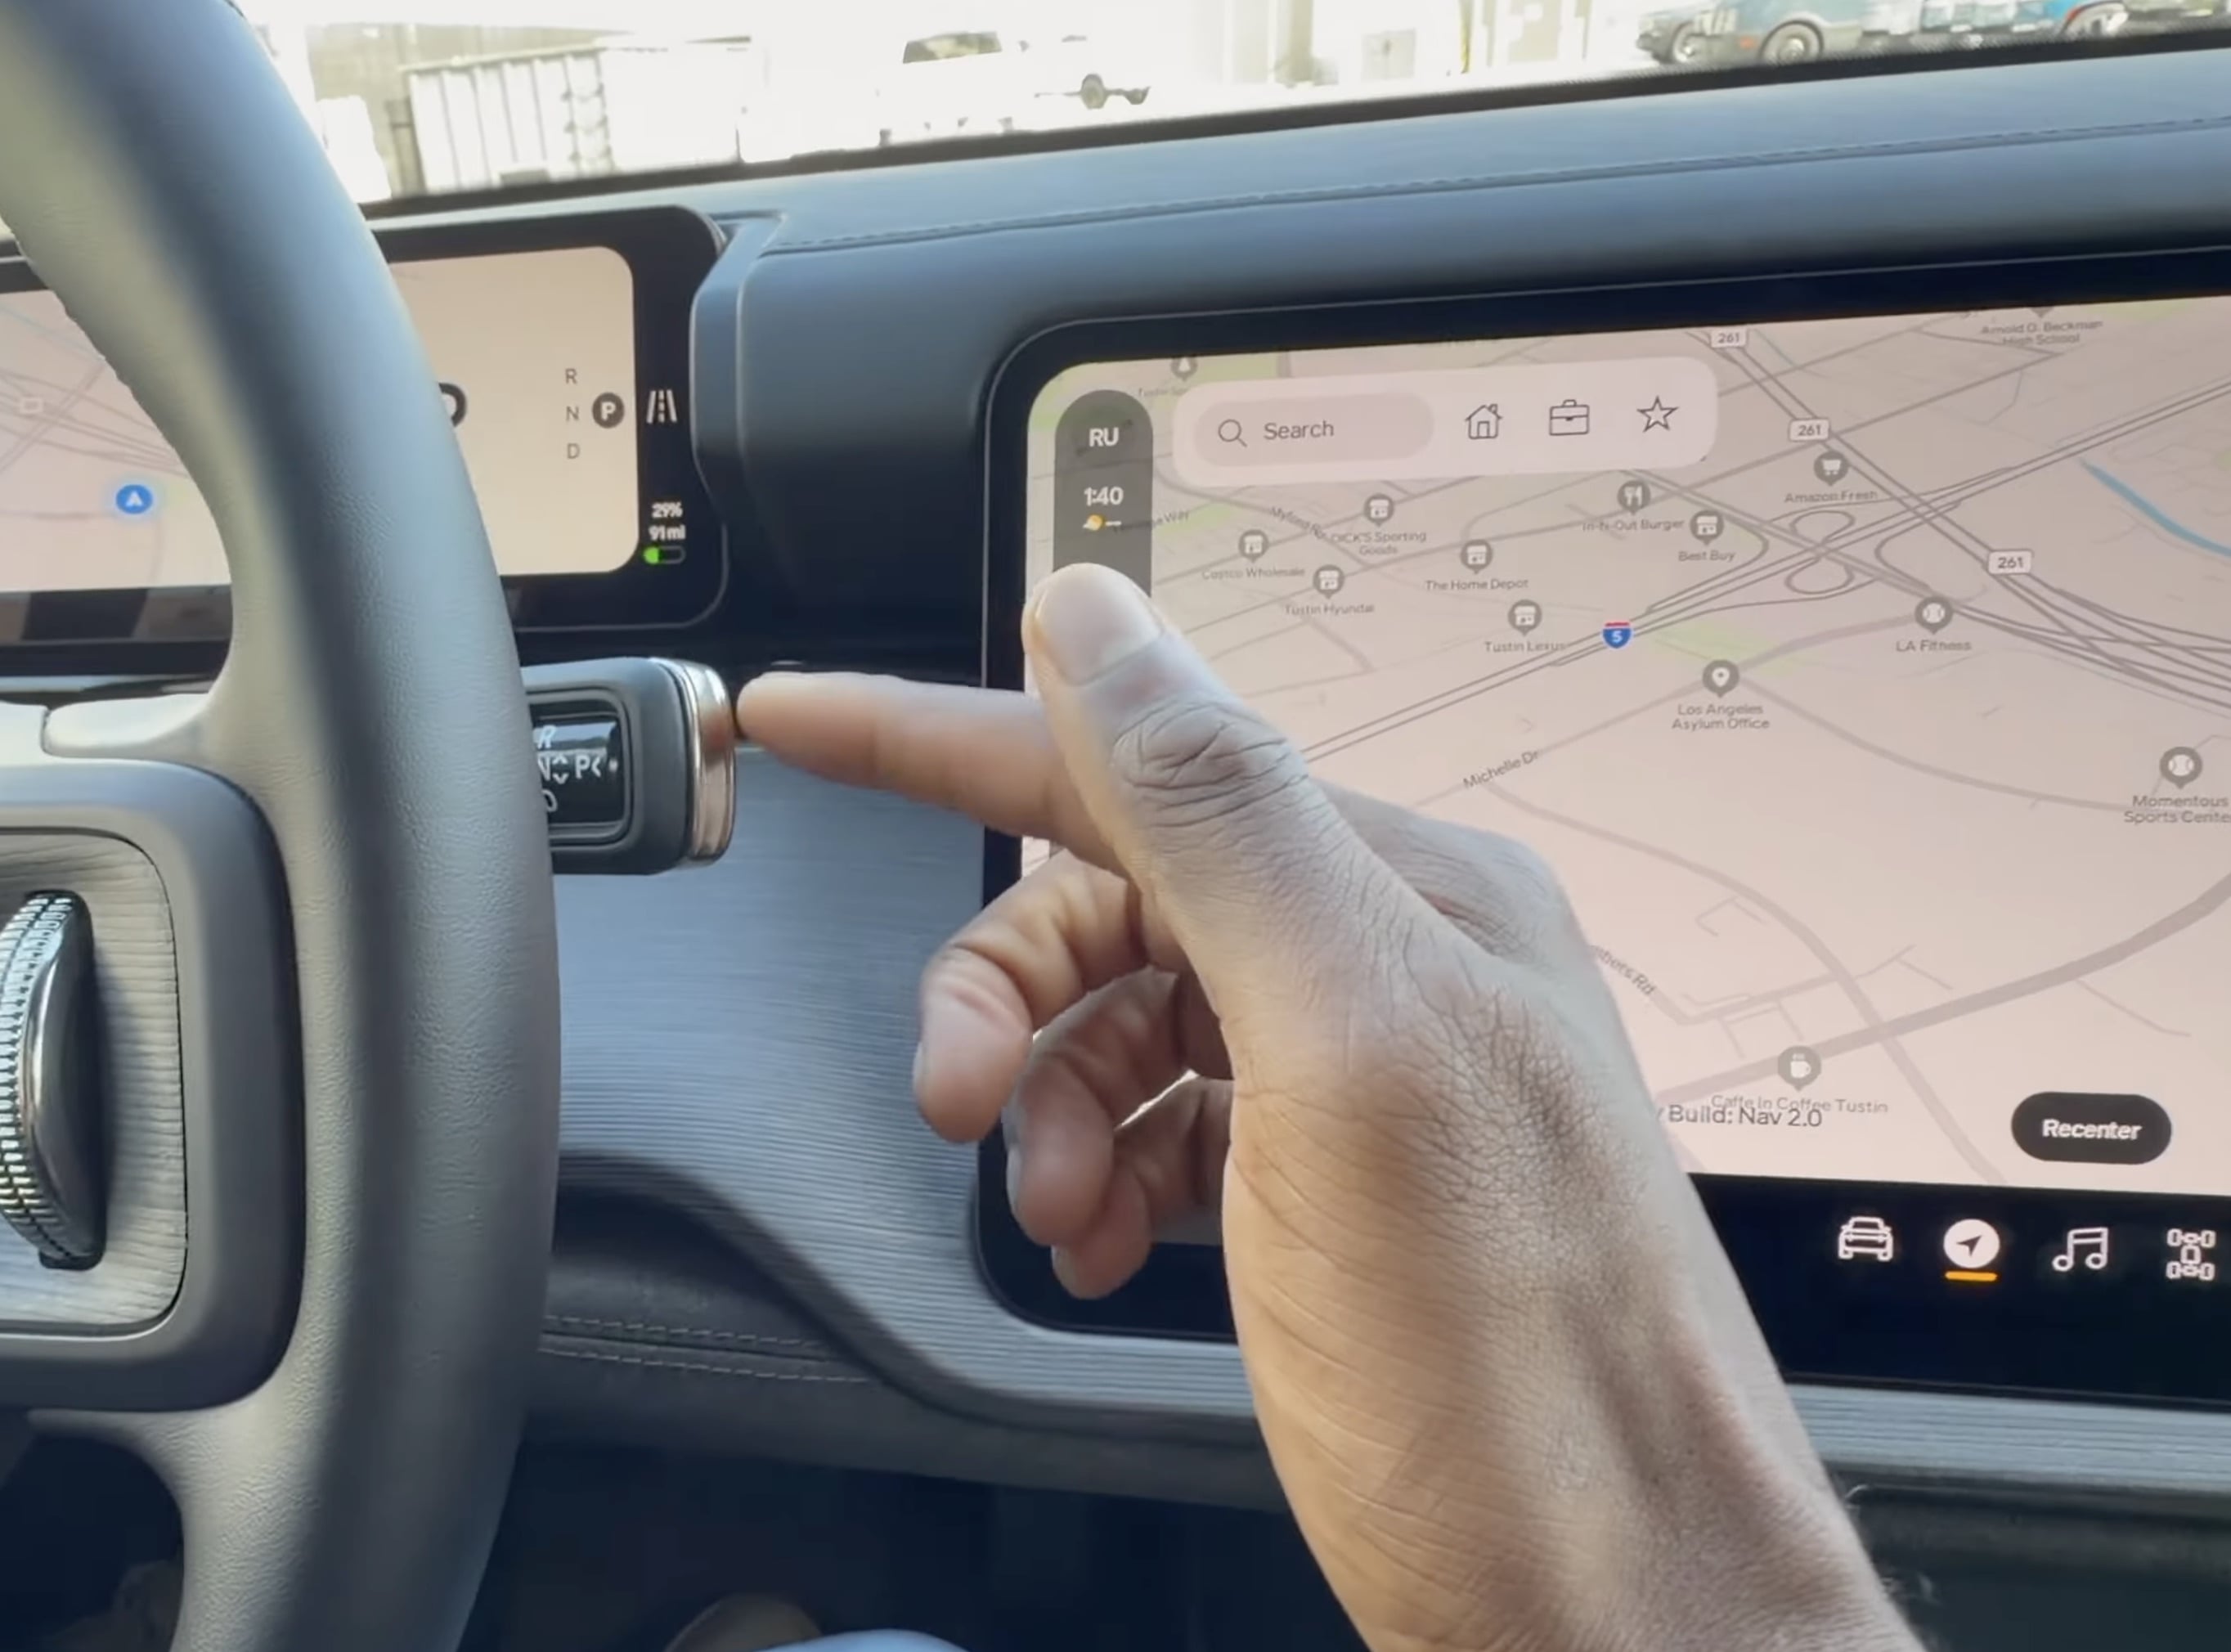
Smoother software
Somehow despite my Model 3 being a 2018 model and probably running a Raspberry Pi compared to the hardware Rivian runs, moving around the OS in the Tesla still feels faster. With the Rivian there’s still lag just bouncing around screens with stuff sometimes taking a second or two to show up. I don’t get it.
I really hope this improves on the R2, and thankfully it looks like it does, Doug DeMuro bounces around the R2’s UI here and it’s much faster than my gen 2 R1S with everything loading virtually instantly. Yay.
CarPlay
I’ve never had a vehicle with CarPlay, we rented a vehicle with it and it was kinda neat but Teslas and Rivians already have like every piece of software I’d want when interfacing with a vehcile (good, traffic-based maps and popular music streaming services), so with the exception of Overcast I don’t personally care about CarPlay at all.
That being said, I know a ton of people do so I kinda hope Rivian looks into it even just as a little windowed experience because I think it would make a lot more people interested.
Alexa is so bad
About a month ago at their Autonomy Day Rivian previewed (among many other cool things) their new “Rivian Assistant”.
This is sorely needed, their current system uses Alexa and. it. is. so. bad.
With our Tesla, you can say “Navigate to Blah” and it will just automatically plot it and you’re off to the races.
Best case with Rivian you’re like, “Alexa, navigate to Bob’s Cool Donuts in Dartmouth”, and Alexa is like “Would you like to navigate to Bob’s Cool Donuts, Dartmouth, Nova Scotia”, “Yes” where it repeats literally the only possible match back to you requiring confirmation every time instead of just… taking you there.
A more typical case is “Alexa, navigate to Bob’s Donuts in Dartmouth”, “Would you like directions to Bob’s Donuts in Toledo, Ohio”. No Alexa, I want the one that’s a five minute drive, not the one a three day drive away. “Oh, okay, try being more specific next time”
Better heat pump
They do a decent job isolating the sound from the outside if you’re in the vehicle, but if it’s cold outside and you heat up your Rivian R1S, you can hear that sucker from a full block away in this super high pitched whine. I’ve understandably had multiple people ask “Is it okay?”.
Better time placement
The UX for knowing the current time in the cabin is not great. There is no clock on the main driver instrument display, and it’s in the furthest place possible on the middle display, so it’s not exactly easy to check. There’s tons of space on the driver display so I either wish they shoved it there, or if you put in directions, I wish it showed you the current time there. Right now it just says “ETA 2:58 PM” which if you’ve been driving for 45 minutes and kinda have lost track of time is not particularly helpful, that could be in 5 minutes or in 25 minutes for all I know.
It looks a bit better on the R2 (seen in MKBHD’s video) where they’re placing it on the middle display a lot closer to the driver, but I still wish they just put it on the driver display.
Better second row release
The R1S and many other modern vehicles have really stupid and downright dangerous second row releases, where the main door handles are electric, so it there’s an electrical issue and you need to get out of the vehicle, you obviously need a manual release. On my Tesla, there’s a (shocker) pull handle that is obvious and you can just pull to get out of the vehicle. Easy peasy (don’t worry Tesla has since changed to an inexplicably stupider, hidden design like Rivian)
The R1 is incredibly stupid and you literally have to pop off trim in the rear door to get access to a cable you can yank. Yeah, good luck remembering that in dire circumstances, so I threw one of those window breakers in the back cubby.
The R2 is better here, Jerry Rig Everything shows a little button patch you can pop off much easier to get to the cable, but still, just put the manual release that the front doors have, this is a basic safety feature and should not be complicated.
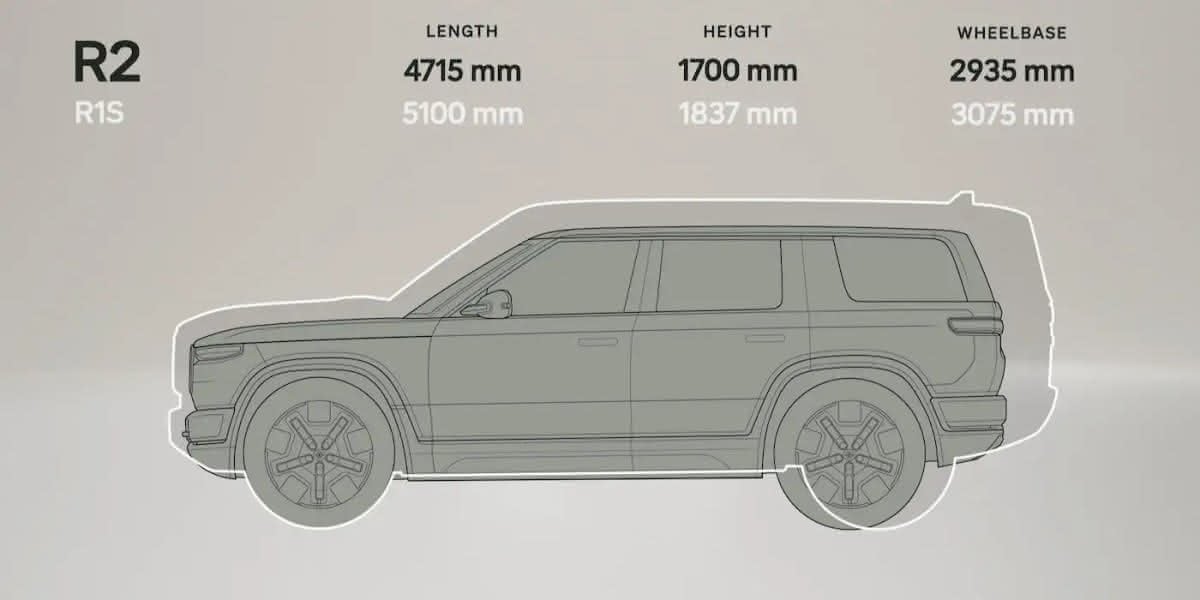
Smaller
This we know will be the case, with the Rivian R2 being about 2 feet shorter than the R1S.
The R1S is a properly large vehicle, which makes it very capable, but I dunno, I do find myself wishing it was a little smaller quite often, so I honestly think if the R2 is compelling enough I might be trading in my R1.
… Does this sound negative?
Reading it back a bit, this post sounds a wee bit negative even though the intention is just to talk about things I hope they improve.
So just to be totally clear, I love the thing. It’s spacious, incredibly capable, looks great, has amazing range, and is just a lot of fun to drive with a ton of creature comforts that I miss every time I drive the Tesla. But there’s always room for improvement!
I’m so excited
I genuinely think Rivian is doing such cool things, and the company behind it seems to have a real passion for building cool products instead of just sitting on Twitter all day, so I’m super excited to see what this mass-market vehicle does for them and I’m hoping for the best.
I didn't know what to put as a header so here are some iClouds (interesting clouds) in Maine
I’ve had a lot of fun working with CKSyncEngine over the last month or so. I truly think it’s one of the best APIs Apple has built, and they’ve managed to take a very complex topic (cloud syncing) and make it very digestible and easy to integrate, without having to get into the weeds of CKOperation and whatnot like you had to in previous years.
That being said, there’s a fair bit of work you still have to do (through no fault of Apple, it’s just that a lot of cloud sync work is application-specific), such as how to handle conflicts, how to integrate the CKRecords into your flow, responding to errors, etc.
More interesting for a blog post, perhaps, I also had a fair few questions going into it (having very little CloudKit knowledge prior to this), and I thought I’d document those questions and the corresponding answers, as well as general insights I found to potentially save a future CKSyncEngine user some time, as I really couldn’t find easy answers to these anywhere (nor did modern LLMs have any idea).
Other awesome resources are Jordan Morgan’s blog post at Superwall, as well as the awesome work by Pointfree on their SQLiteData library which is open source and integrates CKSyncEngine as the syncing layer.
These are great resources to understand how to implement CKSyncEngine which this article won’t be going over. I want to go over questions and edge cases you may encounter.
Conflict resolution
If you’ve used NSUbiquitousKeyValueStore (my only prior exposure to iCloud), CKSyncEngine is thankfully a lot smarter with conflict resolution (and by “conflict resolution” I mean “what happens when two devices try to save the same piece of data to the cloud”).
With NSUbiquitousKeyValueStore if you had super valuable, years old data stored at key “blah” and you downloaded the app onto a new device and somehow set new data to the key “blah” (for instance, existing data hadn’t been downloaded yet) you would completely blow away the existing “blah” data, potentially jeopardizing years of data. Not great, which made me wary of storing much of value there without a ton of checks.
CKSyncEngine is a lot smarter, where you’re dealing with CKRecords directly (more on that below) and thus can save metadata from them, so if you try to overwrite “blah” and your metadata is not up to date, CKSyncEngine will return a failure with the newest version of that data asking you what you want to do (overwrite your local data with the newer cloud version? tag your version with the newer cloud metadata and re-upload it so it works?), rather than blindly overwriting it. This makes it virtually impossible for a new device to come onto the scene and write “bad data” up, messing up existing data.
(And serverRecordChanged is the error in failedRecordSaves you hook into!)
It does beg the question though, “What do you do when there’s a conflict” and that’s what I alluded to earlier with Apple not being able to do everything for you, and you need to make some decisions here. For me, it depends on the data. For the vast majority of the data, always having the “server version win” is perfectly fine for my use case, so I overwrite the local version with the cloud version.
But there’s some situations where I want to be a little choosier, for instance for integer that can never decrease in value (a good example would be how many times you’ve died in a video game), I have a system where it just chooses the higher value between the cloud version and the local version, and chooses that.
You could write a long blog post just on this though, the important part is to choose the right system for your application. An app that creates a lot of singular data but rarely ever modifies it will need a dramatically different system than one that has a large, single body of data that is frequently being edited on multiple devices concurrently.
And remember that CKSyncEngine being effectively a database means you can store a lot more information than the paltry 1,024 keys/1MB total limit that NSUbiquitousKeyValueStore allows, so you can create a much more robust system that’s appropriate to your app, but not necessarily any more complicated!
Deletion conflict resolution
Note that deletions just fire without any conflict resolution at the CKSyncEngine level; if you say to delete something with recordID "blah", CKSyncEngine will trust you know what you’re doing and just delete it (and not compare metadata or anything as it doesn’t even ask for it).
CKRecord handling
One of the only awkward parts of CKSyncEngine is that it operates through CKRecords, which are quite old a construct (much more Objective-C than Swift) you have to decide how to incorporate that into your existing data store. They’re basically a big old string dictionary of data with some metadata.
For me, I mostly use GRDB (SQLite), and you have a nice, easy, hybrid solution where you have your local records with an extra column called something like cloudKitInfo, which is just the CKRecord distilled down into its pure informational metadata. This strips out all the CKRecord of large image and text data, and you’re basically just getting the bare essentials: the metadata fields like its record change tag for conflict resolution when you upload it
If you don’t save these metadata fields you’re going to have a Very Bad Time™ when you go to upload, as your items being uploaded will have no matching metadata, so CloudKit will think you don’t have the most up to date version of that record and give you a conflict error every time.
So my process generally looks like:
When you get a new CKRecord from iCloud to sync with your local store, you extract all the data you care about from the dictionary fields (e.g.: item.postTitle = ckRecord["postTitle"]) into your local Swift object, and then extract the CloudKit specific metadata.
Then, when you go to upload an item after you changed it, you create a CKRecord by initializing it with your existing cloudKitInfo, then set the fields.
This has the nice effect of letting you do basically everything in Swift, and just tacking on the necessary parts of the CKRecord to make the system work properly, without duplicating the entire CKRecord with all of the heavy data fields it may contain.
Backward/forward compatibility
One big worry I had was what if in version 1.0 of my app I have a structure like the following:
structIceCream{letname:StringletlastEatenOn:Date}
And then in version 1.1 of the app I add a new field:
If a user has two devices, one that is updated to version 1.1 and another on 1.0, if I save a new IceCream on version 1.1 of the app with both a name of "chocolate"and a tastiness of 0.95, and sync that back to the device on version 1.0, where they eat the ice cream, then sync that back up, crucially that version of the app doesn’t know about the tastiness variable! So it might effectively sync back up IceCream(name: "chocolate", lastEatenOn: .now), and then when version 1.1 gets that, the tastiness is effectively lost data! Noooooo!
How do we handle this? I dreamt up some complex solutions, but it turns out it’s incredibly easy thanks to the way CKRecord works. CKSyncEngine never documents this anywhere directly,
Gonna intersperse a little addendum here: CKRecord does indeed document this directly here for CKRecord setObject stating in the documentation for the object parameter “If you specify nil, CloudKit removes any object that the record associates with the key”, which seemingly implies if you do not specify nil, it will not be removed. Thank you for the awesome tip, Allan Juenemann!*
but it obviously uses CloudKit under the hood, and CloudKit has dinstinct saving policies under CKModifyRecordsOperation.RecordSavePolicydocumented here. And no matter what policy you choose (we don’t get a choice with CKSyncEngine) all of them detail the same behavior:
CloudKit only saves the fields on CKRecords that you explicitly set. In other words, on version 1.0, when we create our CKRecord that represents our local data, it would look something like this:
Note that we didn’t set tastinessat all, so when it goes up to iCloud, the tastiness field won’t be touched at all as it’s not present, it will just remain what it was. The only way the tastiness field would get reset is it we explicitly set it to nil.
So when version 1.1 pulls down this change that version 1.0 made, the CKRecord it pulls down will still have the tastiness field intact. It’s essentially a factor that old versions of the app can only touch what fields they know exist, so no harm no foul.
The only catch is you can’t go in the other direction: don’t delete tastiness in verson 1.2 of the app if earlier versions expect it to always exist. Give it some innocent default value.
Enums are bad
Enums are a finite set of values, so unless you’re positive that it will never change, don’t use enums in values meant to be cloud-synced.
Why? Say you have this enum in version 1.0 of your app:
What happens when version 1.0 has to decode IceCreamFlavor.vanilla? It will have no idea what that case is, and fail to decode, which you could just treat as a nil value, but if you then try to sync that nil value up, you risk overwriting the existing, good value with nil data (unlike the “Backward/forward compatibility case” above where it was a value stored in a different field, this is all operating under the same field/key). Bad.
Instead, just store it as a string, and you could try to initialize an enum of known values with the string’s raw value if you desire.
Multiple CKSyncEngine instances
You have to be really careful with multiple instances of CKSyncEngines.
At a high level in CloudKit you have CKContainer, which houses three CKDatabase instances: a private one (probably most commonly used), a public one, and a shared one.
CKSyncEngine only allows one instance to manage an individual database, so that means it’s totally fine to have separate CKSyncEngine instances for a private and shared database. (Not for the public database however, as CKSyncEngine does not support public databases.)
But you should not have multiple CKSyncEngine instances managing a single private database (I naively tried to do this to have a nice separation of concerns between different types of data in the app). The instances trip over each othre very quickly, with it not being clear which instance receives the sync events.
You can get around this by creating multiple CKContainers, and having a CKSyncEngine per each one, but that feels messy and from what I understand not really how Apple intended containers to be used. Keeping everything under one instance isn’t too bad even with different kinds of data, as you can use different zones or record types to keep things sufficiently separated.
Should you not call CKSyncEngine methods if the user isn’t signed into iCloud?
Apple’s sample project still does! It seems harmless. From my testing, they get enqueued, but are never actioned upon (they never fail unlike normal CKRecordOperations, they just sit waiting forever), and then the queue is wiped when the user signs in.
What happens if they sign out/sign in while your app is quit?
No worries, you get the appropriate accountChange event on the next app launch.
What is the difference between the account change notifications?
You can either get signedIn, signedOut, or switchAccount.
signedIn happens when they had no account and signed into one. signedOut happens when they had an existing account and signed out.
switchAccounts is a “coalescing” one (you won’t get signedIn/signedOutandswitchAccounts), where if your app is running/backgrounded you will get signedOut then signedIn if the user changes accounts, and you won’t get a switchAccounts notification. You only get switchAccounts if your app was quit and you relaunch the app at which point you’ll get the switchAccounts notification (but neither of the other two).
How does state serialization work?
Every time anything happens with CKSyncEngine you’re given a stateUpdate event, which you’re expected to persist to disk. This encodes the entirety of your CKSyncEngine’s state into a serialized value, so when the app launches the next time it can start off right where it was.
It’s essentially a super charged git commit tag/checkpoint, so iOS knows where your CKSyncEngine exists in time (does it need to pull down any new changes?) and maintains any pending changes/deletions that might have not completed. If your app crashes part way through applying a change, your app simply will not have been issued the new “save checkpoint” notification, so the next time your app relaunches it will simply be restored to the last CKSyncEngine state you saved and retry.
It also initializes synchronously, so if you had any pending items in your serialized state and you initialize CKSyncEngine, you can view your pending items immediately.
Also note that if you initialize CKSyncEngine without any state serialization, you always get an “account change: signedIn” notification even if the user didn’t explicitly just sign into their iCloud account.
CKSyncEngine re-initialization
Per Apple’s sample project, re-initialize your CKSyncEngine (and delete any old state serialization) when either the user signs out, or switches accounts, but not when they transition from signed out to signed in, presumably because in the latter case there’s nothing really to invalidate in the CKSyncEngine when there is in the other two states.
How does error handling work?
Apple’s sample project indicates that there are a number of transient errors that CKSyncEngine handles automatically for you, like rate limiting issues, no internet connection, iCloud being down, etc. Nice!
In most of these cases it means the item just gets immediately added back to the pending items queue and CloudKit will pause the queue for a certain amount of time before retrying.
Other ones, you do need to handle yourself, even if they seem like they should be automatic. A good example is quotaExceeded which you get if the user ran out of iCloud storage and you tried to save something.
In this case Apple pauses the queue until the user frees up space or buys more (or after several minutes, specified by retryAfterSeconds) but does not add your item back, which seems weird to me, so just add it back. But you also can’t just add it back, as that would put it at the end of the queue, so you have to insert it back at the beginning of the queue so it’s the next item that will be retried (since it just failed). Only, there’s no API for this, so grab all the items in the queue, then empty the queue, then re-add all items back to the queue with your failed item at the front.
For other failures, like quotaExceeded, they’re immediately removed from pending items once they fail, so if you want them to be retried you have to add them back manually.
(Remember, the pending queue survives app restarts as it’s serialized to disk through state serialization, see above.)
Embedding record types into record IDs
A small point worth noting is that weirdly CKSyncEngine does not provide the actual recordType (only the string ID) when requesting the fully built CKRecords (which we need in order to tell which SQLite table the ID belongs to), so we can prepend the table to the beginning of the ID string, for instance IceCream:9arsnt89rna9stda5" so we can discern it at runtime.
Let things be automatic
You can manually pull/push to CKSyncEngine with fetchChanges() and sendChanges() but be careful. You can’t call these inside the CKSyncEngineDelegate methods per CKSyncEngineDelegate documentation:
CKSyncEngine delivers events serially, which means the delegate doesn’t receive the next event until it finishes handling the current one. To maintain this ordering, don’t call sync engine methods from your delegate that may cause the engine to generate additional events. For example, don’t invoke fetchChanges(_:) or sendChanges(_:) from within handleEvent(_:syncEngine:).
You can get stuck in weird, infinite loops. In practice I’ve found CKSyncEngine is really great at queuing up changes almost instantly without you having to babysit it and manually pull/fetch, just let it do its own thing and you should get great performance and not run into infinite loop bugs by trying to do things yourself.
(Also note that the quote is kinda confusing, but it refers to those fetch and send changes methods specifically, adding new items to the queue within the delegate is fine and something Apple does in their sample project.)
Zone deletion reasons
When a “zone was deleted” event occurs, ensure you inspect the reason, of which there are 3:
deleted means we (the programmer) did it programmatically, commonly done as it’s the easiest/quickest way to delete all the records in a zone
purged means the user went through the iOS Settings app and wiped iCloud data for our app, which per Apple’s recommendation means we should delete all local data as well (otherwise it would just sync back up after they explicitly asked for it to be wiped, likely because they were running low on storage), and in the purged case we also delete our local system state serialization change token as it’s no longer valid (this is a full reset).
encryptedDataReset means the user had to reset their encrypted data during account recovery and per Apple’s recommendation we treat this as something the user likely did not want to have to do, so reset/delete our system state serialization token and reupload all their data to minimize data loss.
Responding to account status changes
CloudKit also has a NotificationCenter API for monitoring account changes (Notification.Name.CKAccountChanged) but you don’t really need this at all if you’re using CKSyncEngine, everything comes through the accountChange event that the NotificationCenter API would otherwise provide (just distilled down to signedIn, signedOut, or switchAccounts where the NotificationCenter API is a bit more granular). You can use both, but I haven’t found a need.
Note that you should react appropriately to the kind of account change that occurred. For instance, following Apple’s sample project recommendation, if you receive a notification that they signedOut, that could mean they signed out of their iCloud account to give their sibling an old iPhone to play around with, and they may have private data they don’t want their sibling to have access to, so we should take this as a queue to delete local data (if they want the data back, when they sign back into iCloud it will be re-downloaded).
Also note you can get the status of the user’s iCloud account at any point using try await CKContainer.default().accountStatus().
Batch sizes
CKRecords can be a max size of 1 MB, but also note that uploaded batches are limited to 1 MB in size, so if you enqueue 10 items to be uploaded, each 1 MB, iCloud will upload them in sequential, 1 MB batches (I sort of expected a single, 10 MB upload that included all the records).
So that’s uploads, but conversely on the download size, iCloud is happy to download batches much larger than 1 MB in size! I’ve comfortably seen 100 MB+, which can happen when syncing an initial, large library.
Conclusion
If I think of any more notes I’ll add them, but hopefully a bunch of these things (that I had to find out through trial and error) save some other folks time when implementing CKSyncEngine!